How to turn off Sync Library/iCloud Music Library without losing your songs?
iCloud Music Library or Sync Library is a feature included with either an Apple Music or an iTunes Match subscription. It allows you to store your music library in the cloud, making it available on all of your devices that are signed into the same Apple ID. With Sync Library (iCloud Music Library), you can access your music library from your iPhone, iPad, iPod touch, Mac or PC, as well as from the Apple Music app on Android.
When you enable Sync Library (iCloud Music Library), your music library is uploaded to iCloud and any changes you make to your music library on one device are reflected on all your devices. This includes adding or deleting songs, creating or modifying playlists, and more. You can also use Sync Library to access the entire Apple Music catalog, including any songs or albums you don't already own.
However, Sync Library (iCloud Music Library) has its quirks. This convenient feature matches and replaces songs or albums already on your device with high-quality versions of Apple's music streaming library (when available). This process can lead to messy metadata, missing album artwork, and matching the wrong song. Users have also complained on the forums that the feature is confusing and accidentally wipes files from their devices. Also, it means you are locked out of listening to your music on your Apple device.
How to turn off Sync Library?
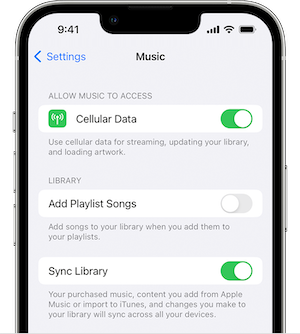
On your iPhone, iPad, or iPod touch
- Make sure that your iPhone or iPad is signed in with the same Apple ID that you use with your Apple Music subscription.
- Go to Settings.
- Tap Music.
- Turn off Sync Library.
On your Mac
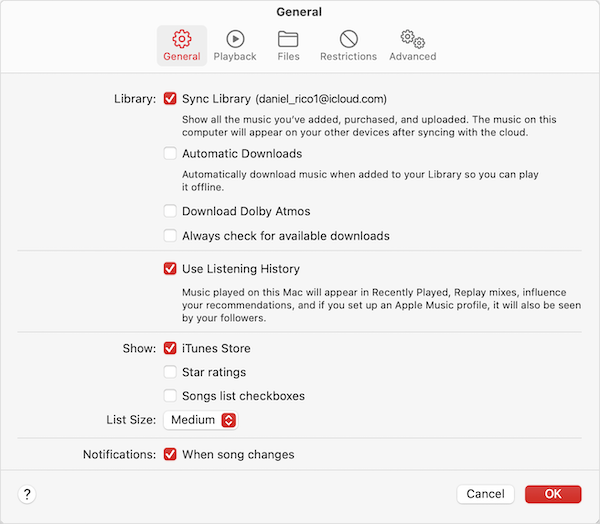
- Open the Apple Music app.
- In the menu bar, choose Account and make sure that you're signed in with the same Apple ID that you use with your Apple Music subscription.
- Choose File > Library > Organize Library. Then select Consolidate files.
- Choose Music > Settings or Music > Preferences.
- Click the General tab.
- Uncheck Sync Library.
- Click OK.
On Windows
- In the iTunes app on your PC, sign in to the iTunes Store using the same Apple ID that you used to set up iCloud Music Library on the first computer.
- Choose Edit > Preferences, then click General.
- Uncheck the iCloud Music Library checkbox.
If you turn on iCloud Music Library on a device, all the music that’s currently on the device is deleted and replaced with songs from iCloud. Also, you can’t use iTunes to sync music with the device. You can add songs to the device only by downloading them from iCloud.
What happens after turning off Sync Library?
If you turn off Sync Library (iCloud Music Library), your music library will no longer be stored in iCloud, and any changes you made to your library while using iCloud Music Library will not be saved. This means that any songs or albums that you added to your library through Apple Music will no longer be available, and any playlists that you created using Apple Music will be deleted.
However, any music that you added to your library manually, either by purchasing it through iTunes or importing it from a CD or other source, will still be available on your device. These songs will not be affected by turning off Sync Library (iCloud Music Library).
It's important to note that if you have enabled the "Optimize Storage" option for Apple Music, turning off Sync Library may also delete some of the music that has been automatically downloaded to your device to save storage space. Therefore, you should make sure that you have a backup of any important music before turning off Sync Library (iCloud Music Library).
If you want to sync your local music library from your Mac to another device, you'll have to do so manually by connecting your device to your Mac and transferring it.
If you choose not to enable Sync Library (iCloud Music Library) on one or more devices, even if you do enable it on your Mac, it won't affect those devices that do have it enabled. Nor will your Apple Music activity have any effect on devices that don't have iCloud Music Library enabled.
Any songs, albums, or playlists you save from Apple Music won't sync with devices that don't have Sync Library (iCloud Music Library) enabled, even if you've downloaded them to your Mac. Also, you can't add Apple Music songs or playlists to your library or download Apple Music content.
How to turn off iCloud Music Library without losing your songs?
If you choose to turn off Sync Library (iCloud Music Library) but still want to add Apple Music songs and playlists to your library, you can download apple Music songs and playlists to MP3 first.
Ondesoft Apple Music Converter will download and convert all Apple Music to MP3, M4A, FLAC, WAV, and other DRM-free audio formats. Then you can share them with family members without limitation. More importantly, conversion speed can be up to 10X and all ID3 tags can be preserved. Keep on reading and learn how to convert protected Apple Music to other audio formats so that you can share them with family or friends.
1. Download and Launch Apple Music Converter
Download, install and launch Ondesoft Apple Music Converter on your Mac or Windows.


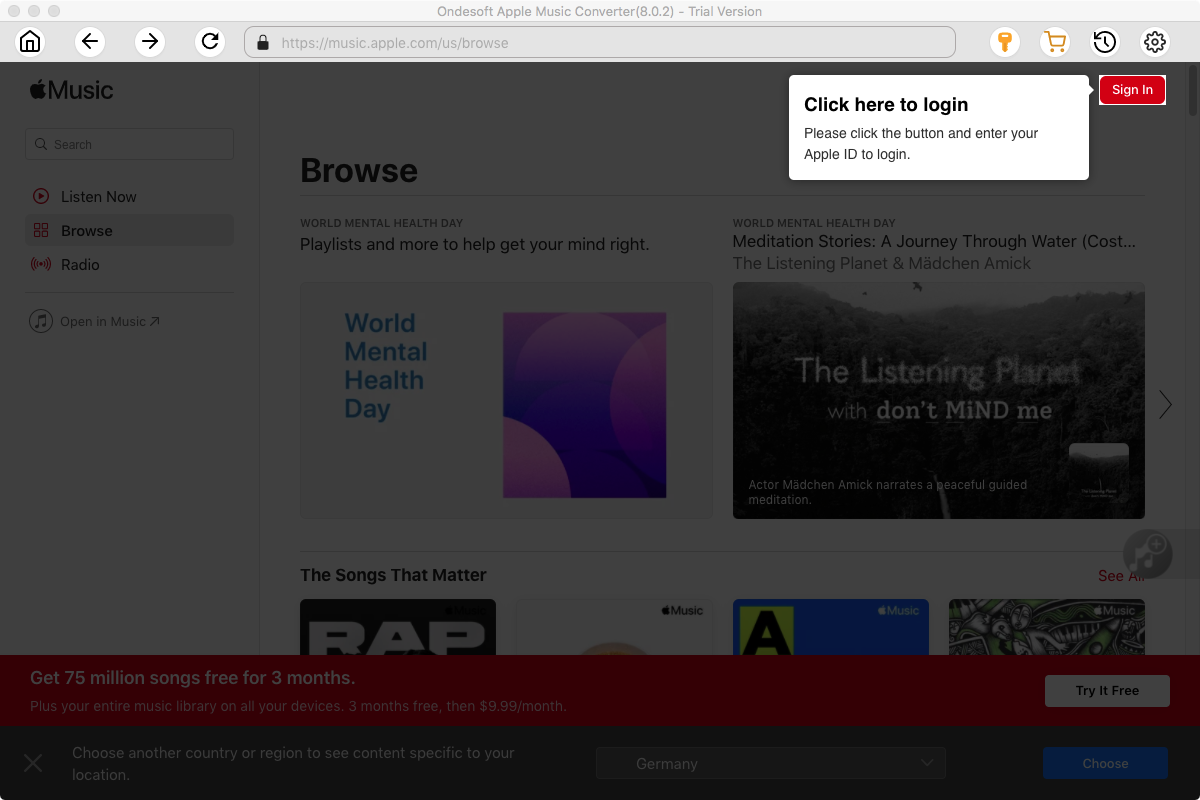
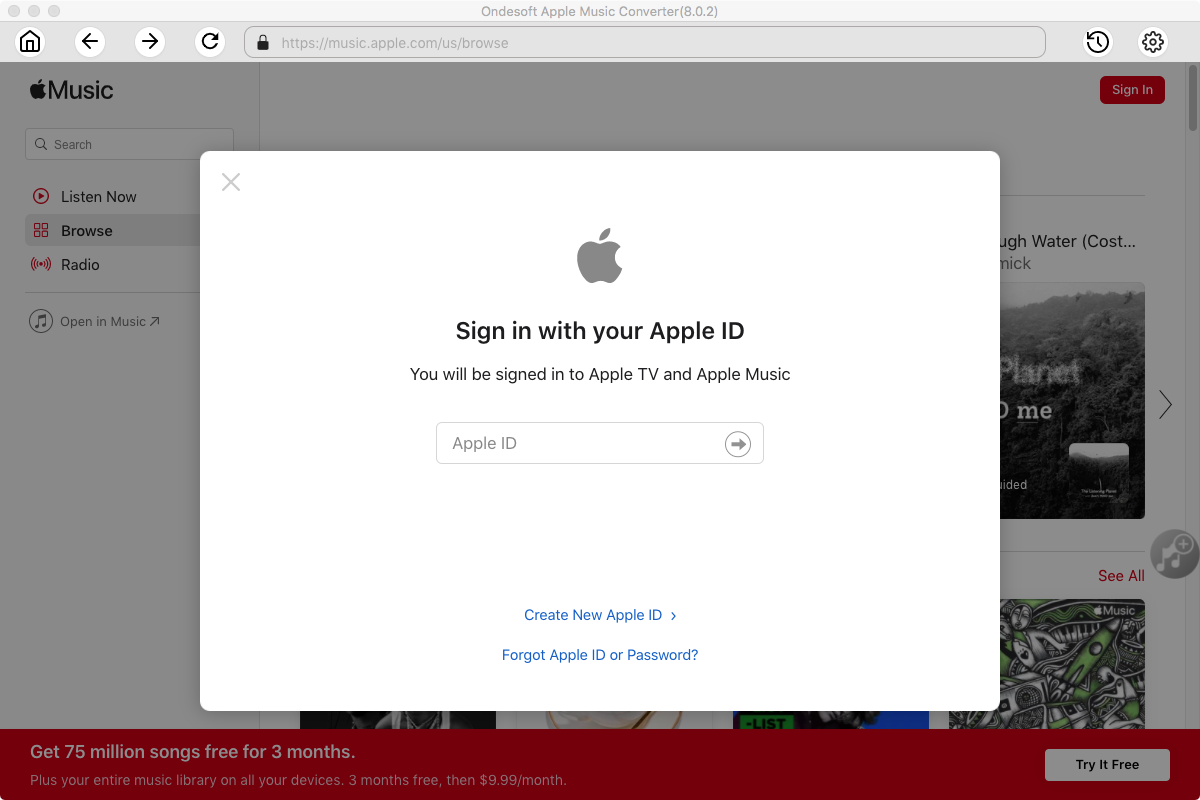
2. Sign in your Apple Music account
Click the Sign in button and enter your Apple ID.
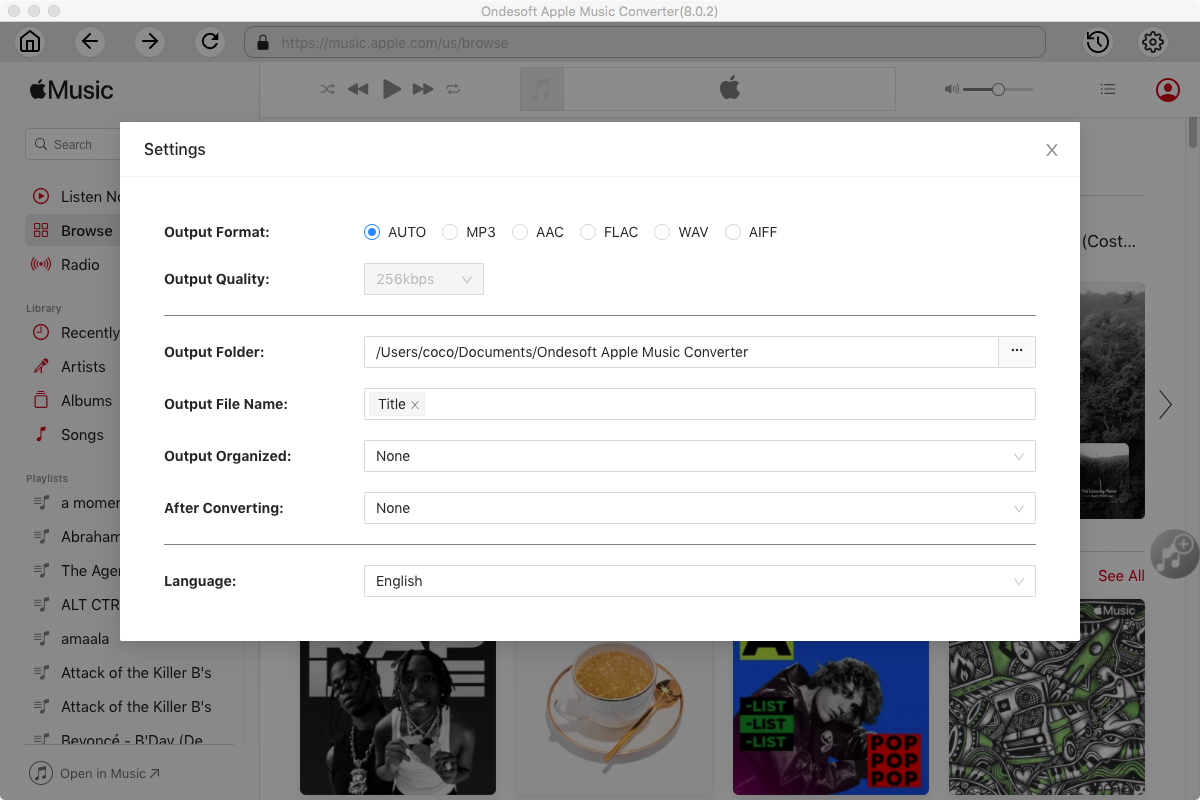
3. Change output format(optional)
The default output format is lossless M4A. Ondesoft Apple Music Converter also supports converting Apple Music to MP3, AAC, FLAC, WAV and AIFF. You can also customize output file name with any combination of title, artist, album, playlist index and track ID.
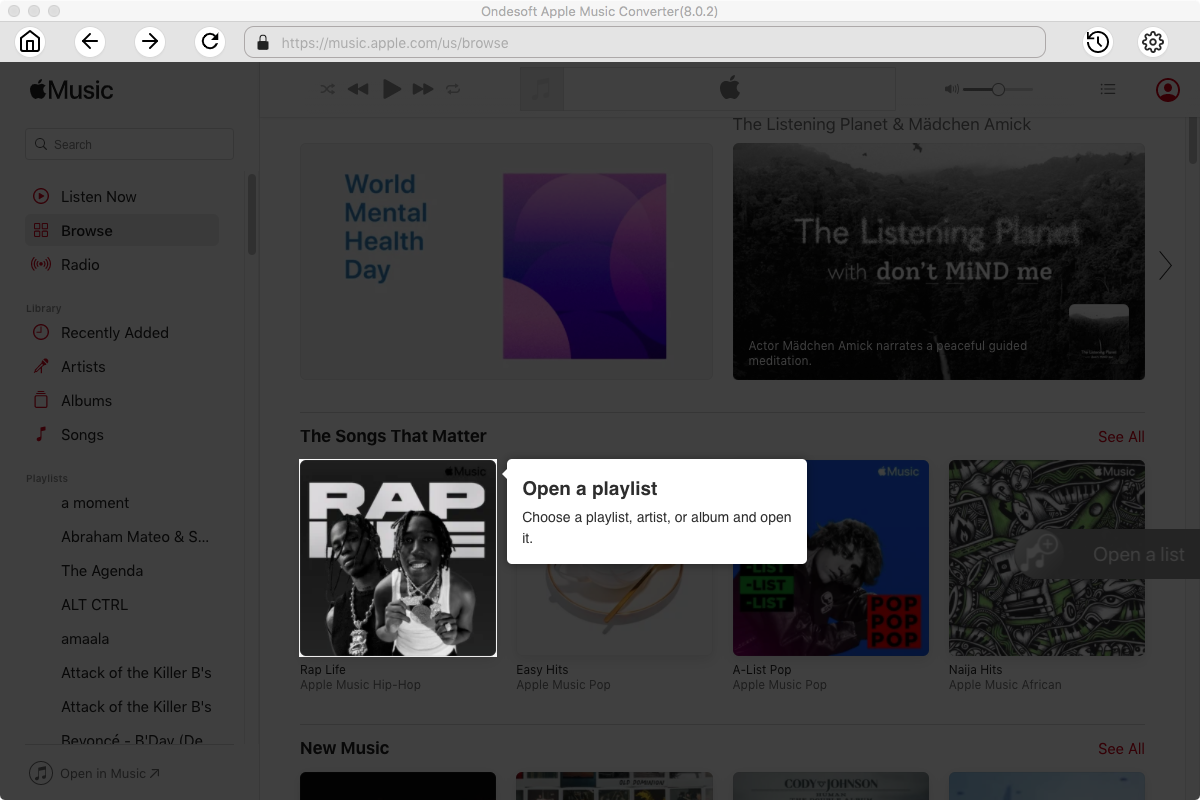
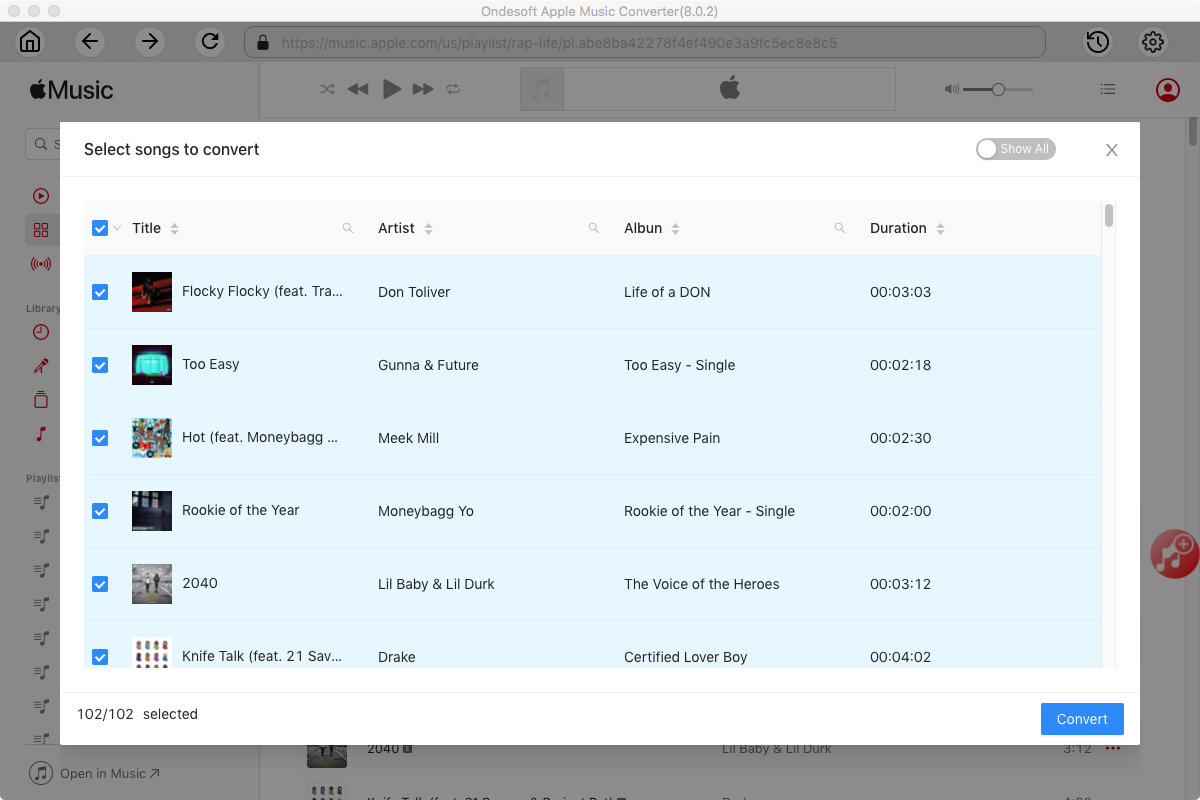
4. Select music
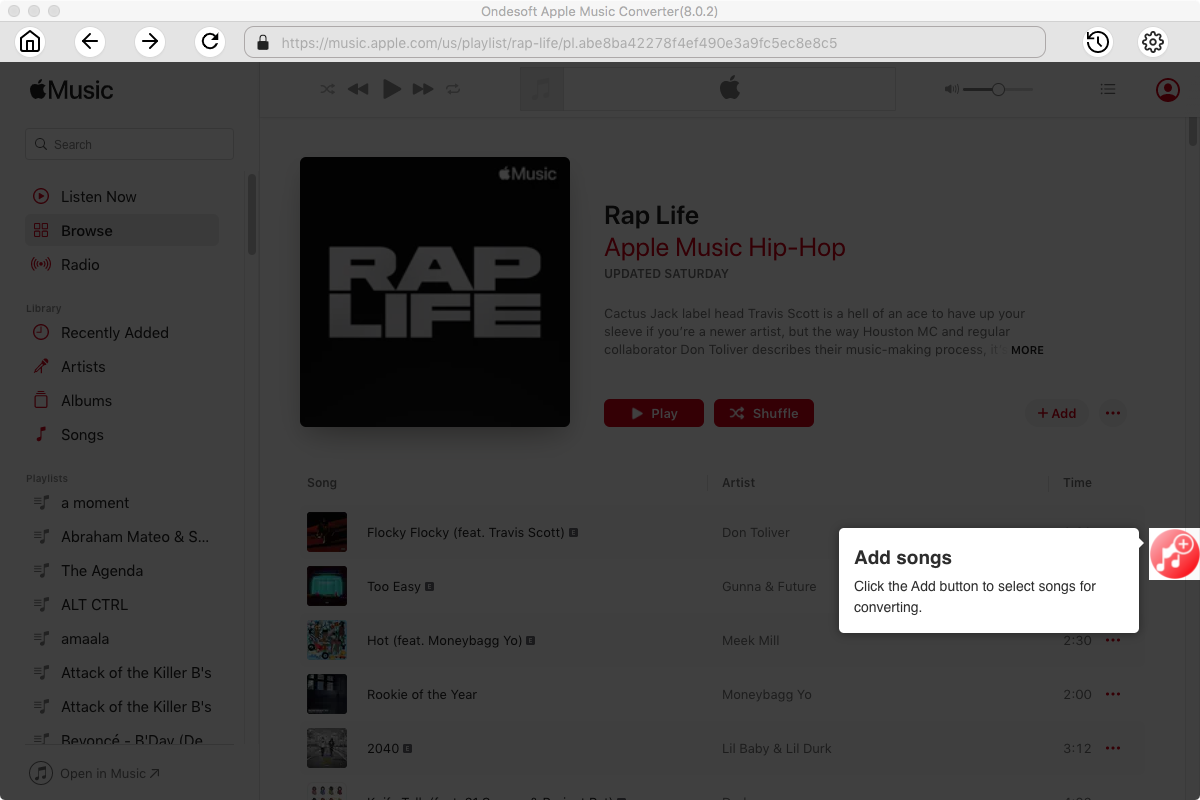
Follow the on-screen instructions to choose the playlist or album you want to convert.
Click Add songs.
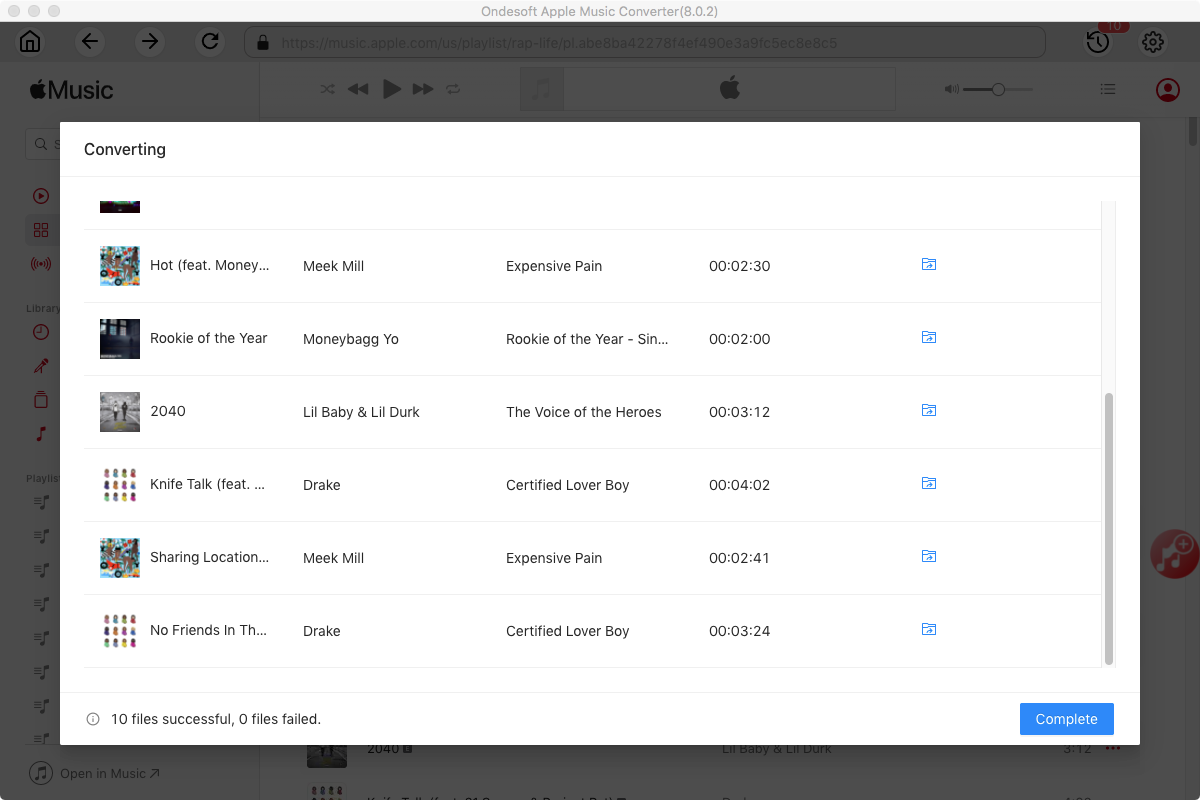
5. Start Conversion
By default, all songs in the playlist/album will be checked. If there are songs you don't want to convert, please uncheck the box. Then click Convert button to start downloading songs to the format you choose.
After conversion, click below folder icon to quickly locate the downloaded songs. Now add them to your library.
Features of Ondesoft Apple Music Converter:
Built-in Apple Music web player
Ondesoft Apple Music Converter features built-in Apple Music web player.
Once logged in your Apple Music account, you can easily browse and select any songs, albums and playlists you want to download.
Customize profile settings
Apple Music to MP3 converter allows you to customize Codec, Bitrate, Sample rate and Channels of the output file. Also you may save them as custom profile for future use.
Fast Conversion Speed
The conversion speed can be as fast as 16X and you are free to set it as you desired.
Search Function
The powerful search function enables you to quickly find Apple Music tracks you need according to name, artist and album.
Customize file name format
Output file name can contain Title, Artist, Album, TrackID and DiskID and you are free to customize it as you like.
Save ID tags
ID tags such as song name, Artist name, Album, Album artist, Genre and Artwork will be saved to the output MP3 and M4A files.
Batch conversion
Batch conversion allows you to convert as many Apple Music tracks as you want at a time.
Apple Music Converter

Download Apple Music songs, albums, playlists to MP3, M4A, AAC, FLAC, WAV and AIFF.

