How to Set Apple Music Equalizer?
Apple Music Equalizer allows you to adjust the audio settings to modify the sound output according to your preferences. It consists of a set of preset equalizer options and also provides the ability to manually customize the equalizer settings.
The preset equalizer options are pre-defined configurations to enhance the audio for specific music genres or styles, including settings like Rock, Pop, Jazz, Classical, and more. Each preset adjusts the audio frequencies to emphasize or de-emphasize certain aspects of the sound to suit the particular genre.
In addition to the preset options, the Apple Music also allows you to manually adjust the Equalizer settings. This enables you to fine-tune the individual frequency bands, such as the bass, treble, or mid-range, by increasing or decreasing their levels. By customizing the equalizer, you can tailor the sound output to your personal preferences or compensate for specific audio characteristics of your listening environment or equipment.
Apple Music Equalizer is available in the Apple Music app on various devices, including iPhone, iPad, and Mac, providing you with the flexibility to optimize your music listening experience according to your desired sound profile.
How to Set Apple Music Equalizer on your Mac?
Apple Music for Mac also includes an Equalizer feature that allows you to adjust the audio settings for a personalized listening experience. Here's how you can access and use the Apple Music Equalizer on Mac:
- Open the Apple Music app on your Mac and play a song or audio track.
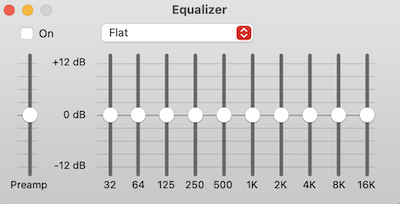
- In the menu bar at the top of the screen, click on "Window" and select "Equalizer" from the dropdown menu. The Equalizer window will appear, displaying a list of preset equalizer options.
- Choose a preset from the list, such as "Rock," "Classical," "R&B," or select "Flat" for no equalization.
- You can also customize the equalizer settings by selecting "Manual" from the list. Then, you can adjust the individual frequency sliders to increase or decrease specific audio frequencies. Drag the sliders up or down to fine-tune the bass, treble, or mid-range frequencies according to your preferences.
- As you make adjustments, you can listen to the changes in real-time by playing a song in Apple Music. Once you've set the desired equalizer settings, you can close the Equalizer window.
- The next time you play music in Apple Music on your Mac, the selected equalizer preset or custom settings will be applied to enhance the sound based on your preferences.
Please note that the Equalizer settings in Apple Music for Mac are specific to the app and do not affect the audio settings of other applications or the system-wide audio settings on your Mac.
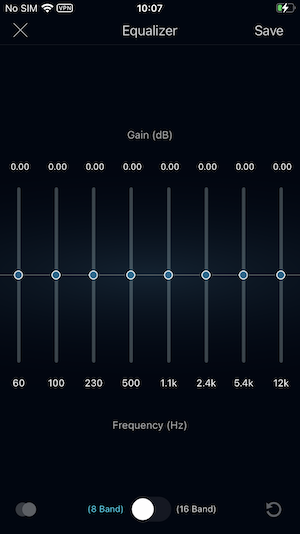
How to Set Apple Music Equalizer on your iPhone or iPad?
Here's how you can access and use the Equalizer:
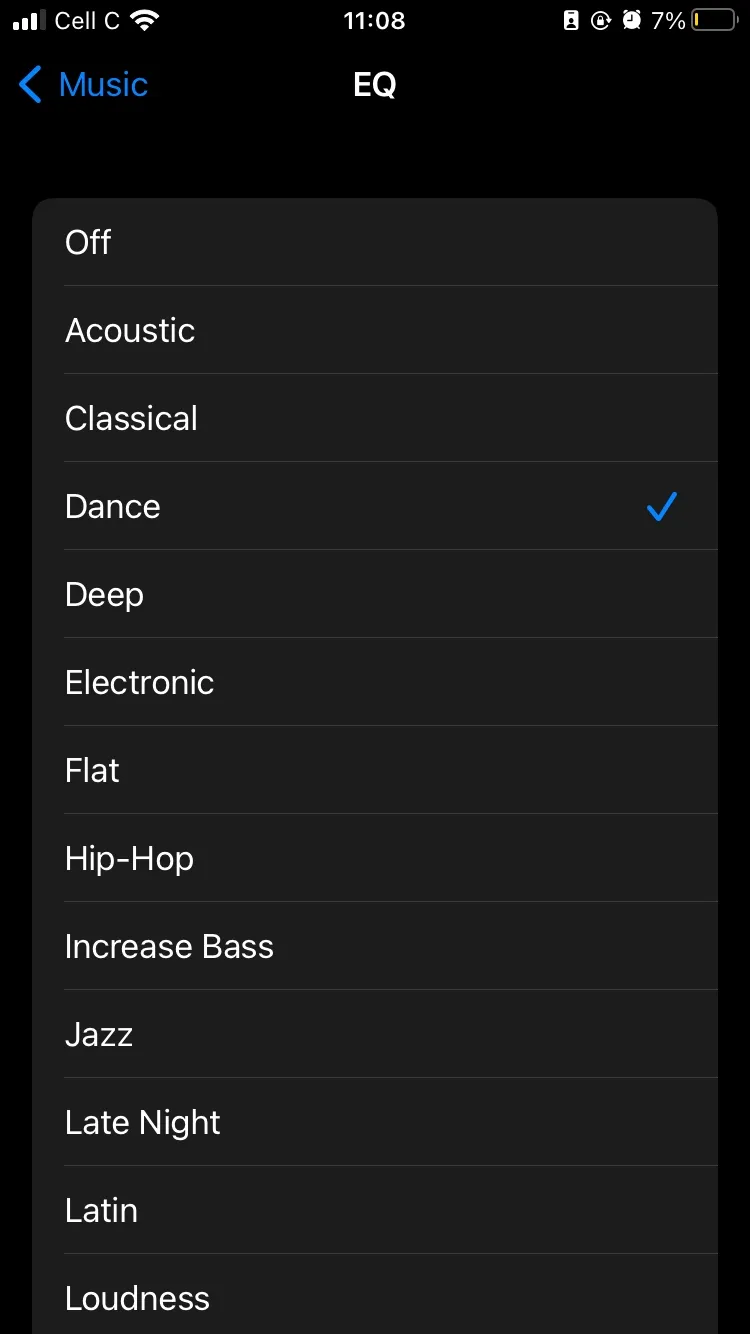
- Open the Settings app on your iPhone or iPad.
- Scroll down and tap "Apps > Music"
- Tap on EQ to access the EQ settings page.
- If you haven't previously configured EQ for Apple Music on your device, it will be disabled by default. On the EQ page, you can explore a variety of options tailored for different music genres. It's recommended to listen to a song while adjusting the EQ settings to hear how each choice affects its sound.
- Try different settings until you discover the perfect one for the song you're currently playing or for the genre you typically enjoy streaming on Apple Music.
Note: The Apple Music Equalizer settings are specific to the Apple Music app and do not affect the audio settings of other apps or system-wide audio settings on your device.
Unlike the Equalizer for Mac, the built-in Apple Music equalizer for iPhone/iPad only offers custom presets with no way to customize the sound effects. To access additional equalizer settings and customize your audio sound, you can use third-party equalizer apps available for your device. These apps offer expanded options to fine-tune and personalize your audio experience.
How to use third-party Equalizer with Apple Music on your iPhone or iPad?
Boom: Bass Booster & Equalizer
Enhance your music listening experience with the Boom App, the ultimate Bass Booster and Equalizer available for both iPhone and Android. This app transforms your audio with a customizable 16-band equalizer and expertly crafted presets to suit any preference. With the Boom App, you can also immerse yourself in the 3D surround sound, bringing your music to life regardless of the headphones you use.
1. Install and open Boom: Bass Booster & Equalizer on your iOS.
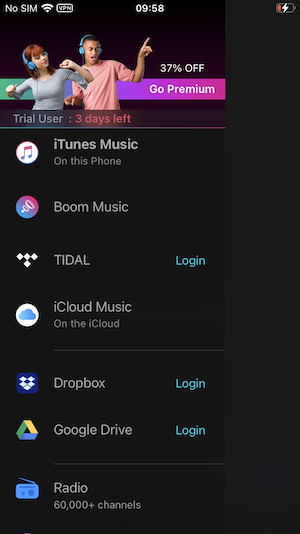
2. Tap the three-lines icon on the top left corner and choose iCloud Music. All songs, albums and playlists in your Apple Music library will be shown here.
3. Choose the songs you want to play. Tap the playing song and select the equalizer icon on the left bottom corner.
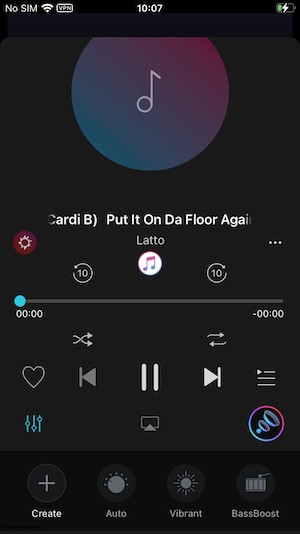
4. Here you can choose presets or tap Create to customize the Equalizer.
However, some other equalizer apps can't apply equalizer directly to Apple Music songs because of DRM protection. DRM protection prevents third-party apps from applying sound effects to your Apple Music songs.
If you want to bypass Apple Music's DRM protection and use third-party equalizer apps to customize your audio sound, you can buy songs from iTunes. But you're already subscribed to Apple Music, and it may seem unreasonable to buy songs again from iTunes.
Luckily, with Ondesoft Apple Music Converter, you can easily download any Apple Music songs to MP3 and you'll be able to apply equalizer to the downloaded Apple Music songs.
Ondesoft Apple Music Converter offers the capability to convert any Apple Music or iTunes songs in your library to high-quality formats such as MP3, AAC, WAV, FLAC, M4A, and AIFF, without compromising the audio fidelity. Notably, this converter stands out with its exceptional speed, performing downloads and conversions nearly ten times faster than comparable software. Furthermore, it is seamlessly integrated with the Apple Music web player, enabling batch conversion of Apple Music playlists or albums to your preferred format, all without the need for the Apple Music app. To learn how to download Apple Music as MP3 and acquire Apple Music for free, the following tutorial will guide you through the process.
1. Download and Launch Apple Music Converter
Download, install and launch Ondesoft Apple Music Converter on your Mac or Windows.


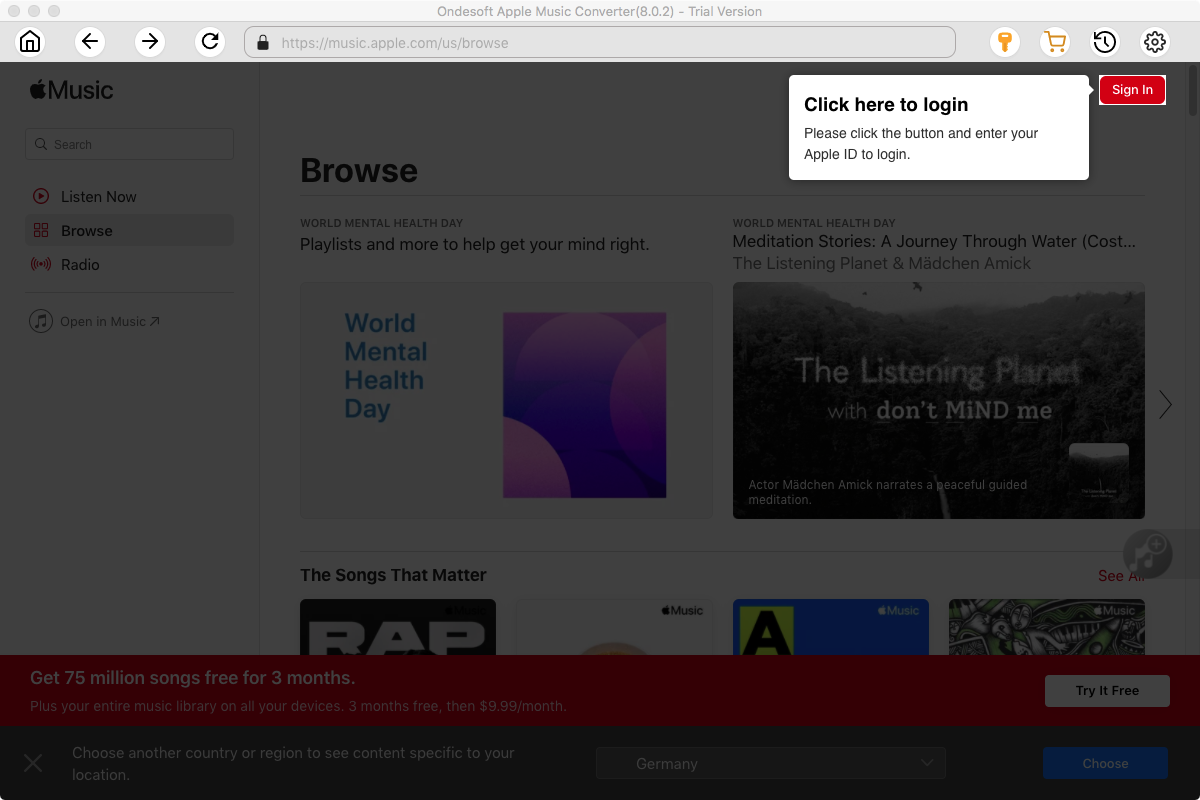
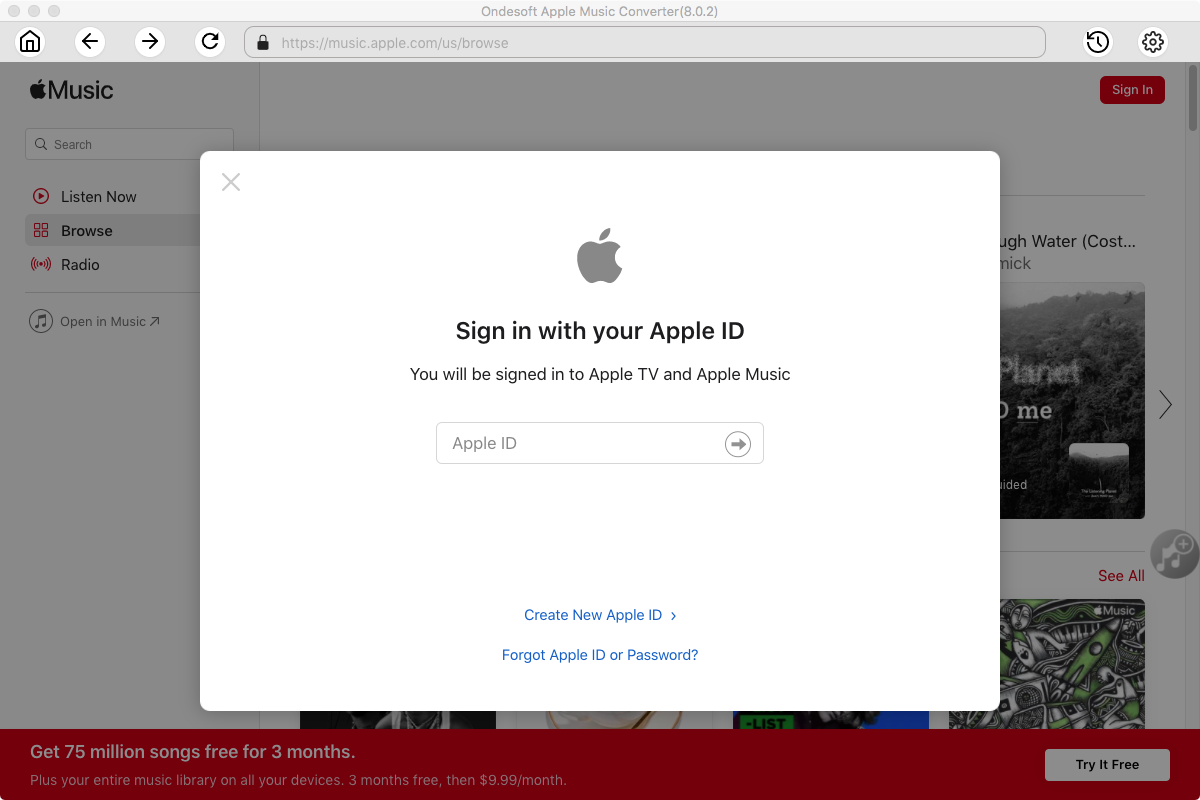
2. Sign in your Apple Music account
Click the Sign in button and enter your Apple ID.
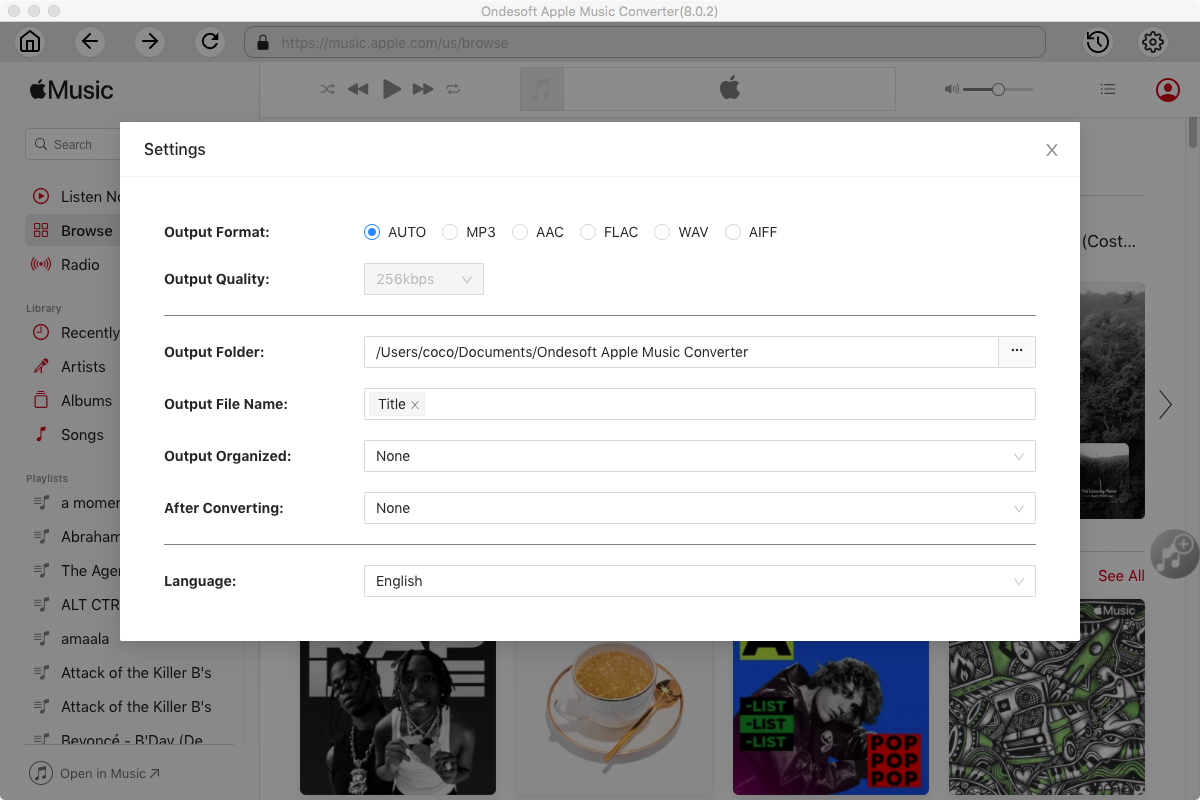
3. Change output format(optional)
The default output format is lossless M4A. Ondesoft Apple Music Converter also supports converting Apple Music to MP3, AAC, FLAC, WAV and AIFF. You can also customize output file name with any combination of title, artist, album, playlist index and track ID.
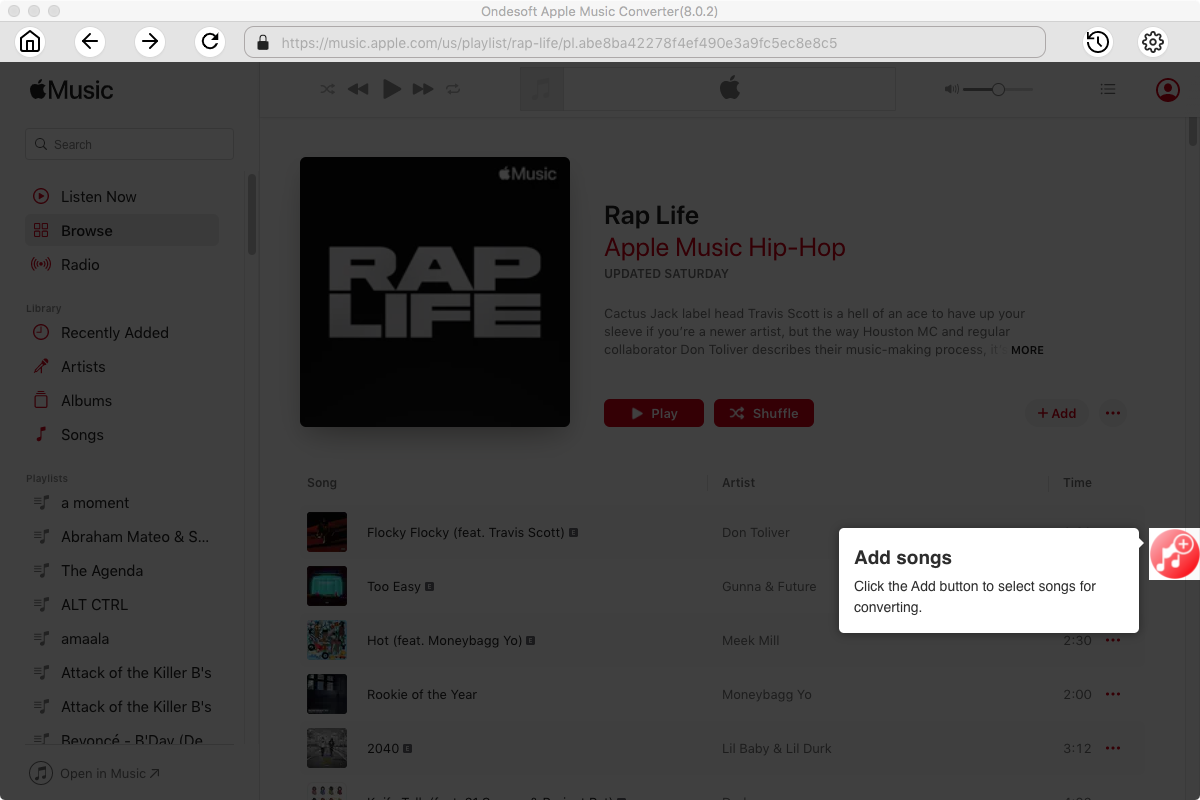
4. Select music
Follow the on-screen instructions to choose the playlist or album you want to convert.
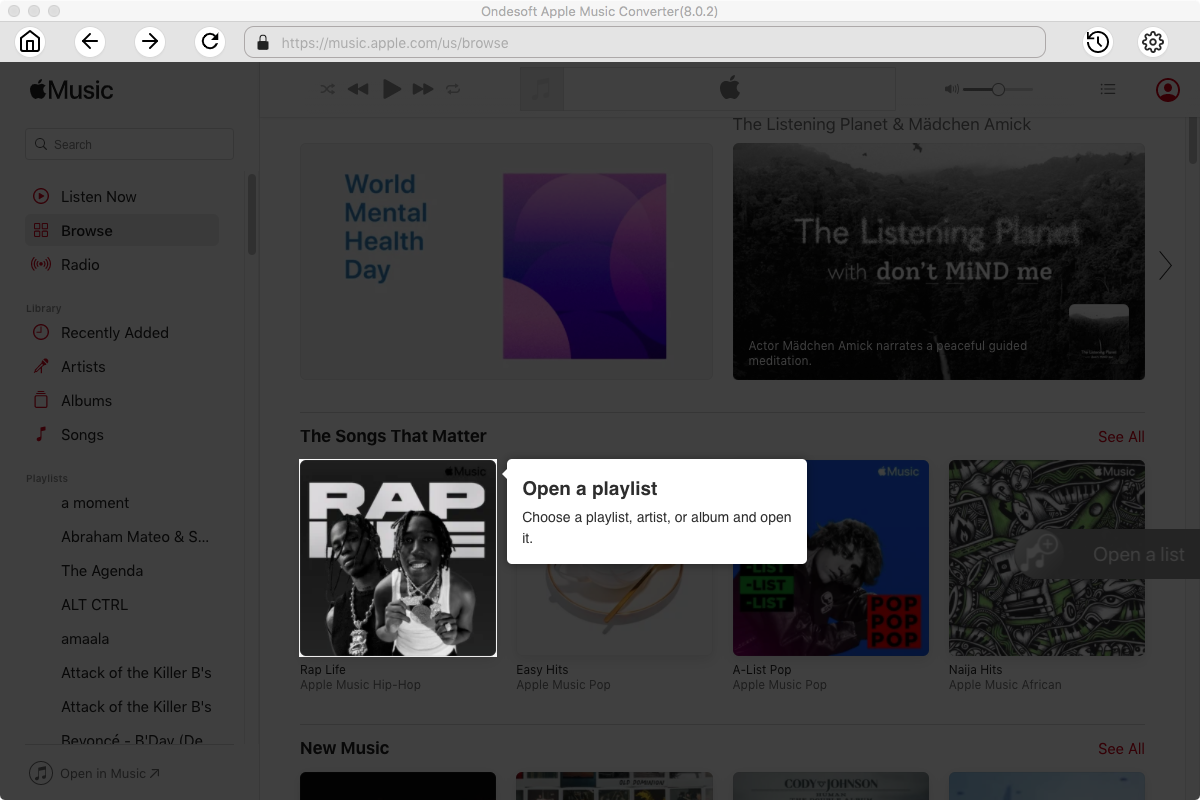
Click Add songs.
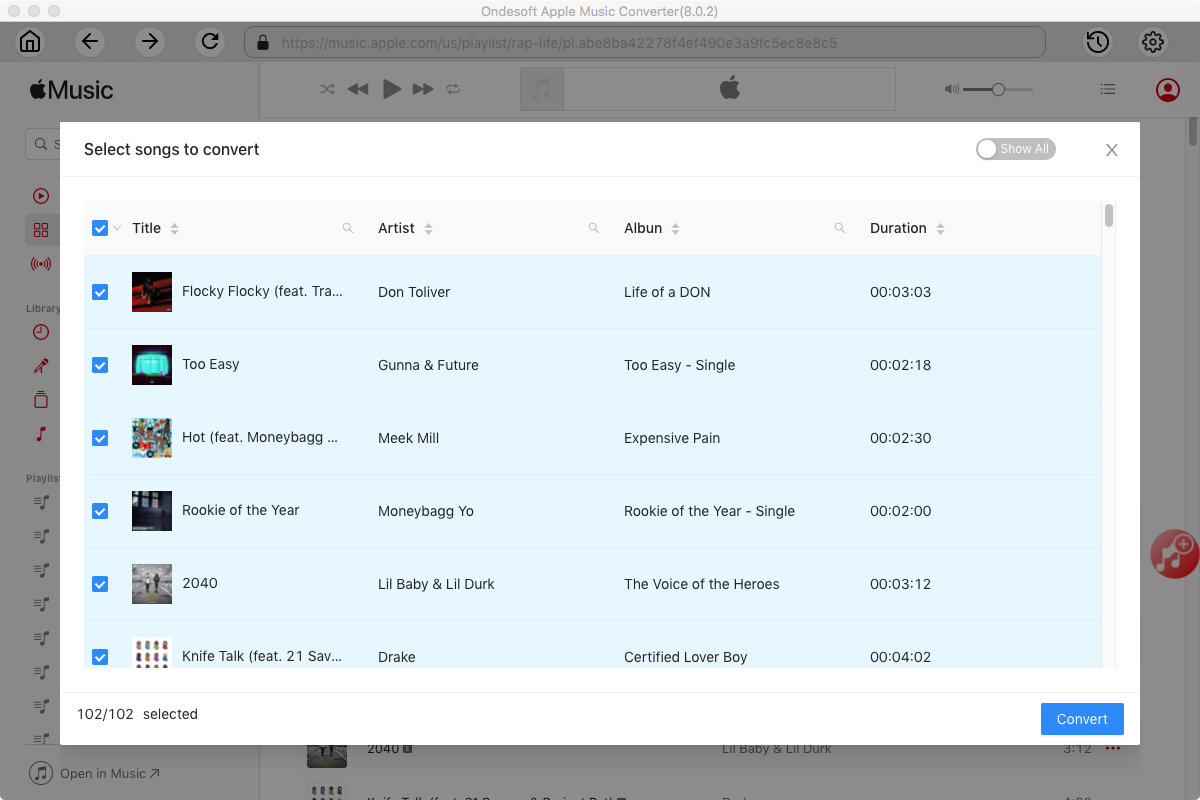
5. Start Conversion
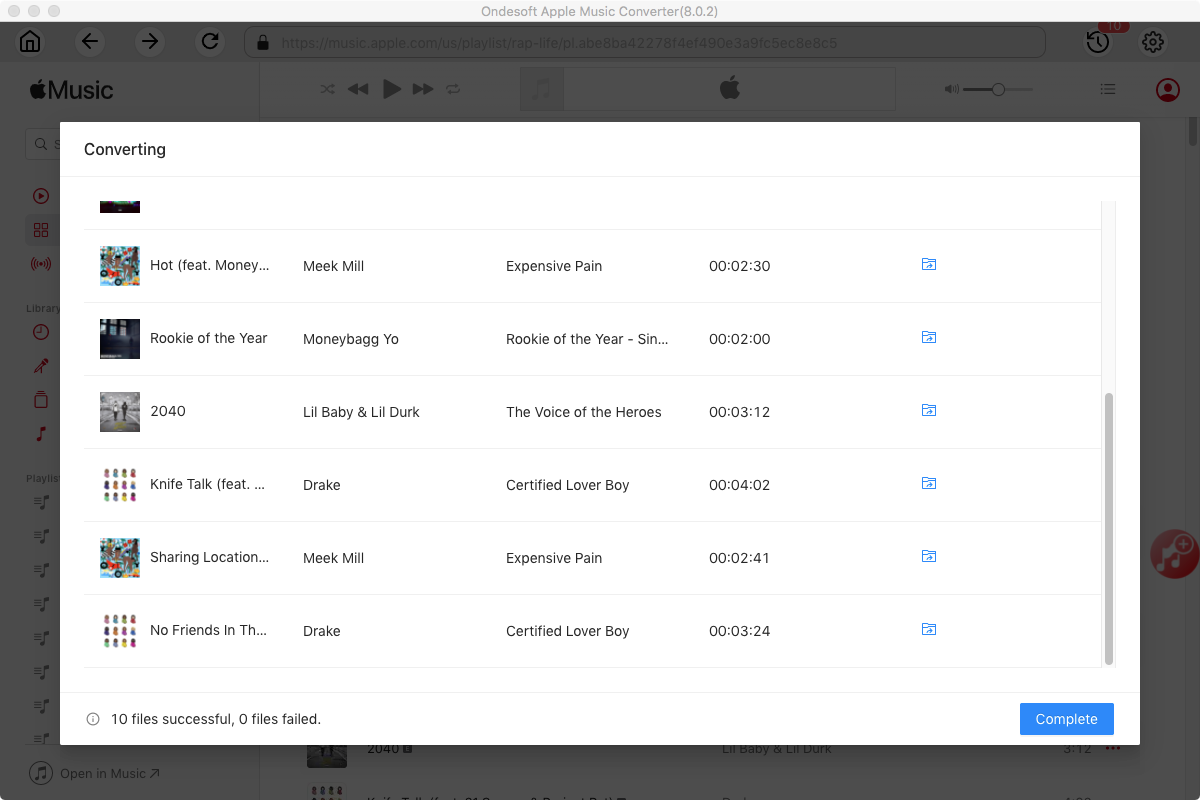
By default, all songs in the playlist/album will be checked. If there are songs you don't want to convert, please uncheck the box. Then click Convert button to start downloading songs to the format you choose.
After conversion, click below folder icon to quickly locate the downloaded songs.
Apple Music Converter

Download Apple Music songs, albums, playlists to MP3, M4A, AAC, FLAC, WAV and AIFF.

