How to set Apple Music Sleep Timer on your iOS/Android/Mac/Windows/HomePod
Sleep timers are commonly found in music streaming apps, media players, alarm clock apps, and even smart speakers, offering a convenient way to control the duration of your audio sessions and tailor them to your specific needs. However, when it comes to Apple Music, only the Android app has sleep timer feature. Luckily, there are also alternatives to enable sleep timer on iPhone, Mac and Windows.
Read More: How to set Spotify as alarm sound on Windows?
Part 1. Set Apple Music Sleep Timer on iPhone /iPad
Apple Music iOS app doesn't support Sleep Timer feature. Luckily, your iPhone has a built-in sleep timer allowing you to set a custom time on any content. All you have to do is tweak a setting in your Clock app's timer.
- Open the Clock app and tap the Timer tab in the bottom right corner.
- Set the time duration. Tap When Timer Ends, swipe to the bottom and tap Stop Playing.
- Tap Set in the top right corner and press Start.
- Now listen to Apple Music and your music will stop with the timer.
This works as a sleep timer for Apple Music, as well as other apps like YouTube too.

This method will allow you to set a timer that will stop any media playback, including Apple Music, after the specified duration. You can then play your music in the Apple Music app and it will automatically stop playing when the timer ends.
Part 2. Set Apple Music Sleep Timer on Android
If you are using the Apple Music app on your Android device, you can indeed take advantage of the sleep timer feature. To set a sleep timer in Apple Music on your Android phone, follow these steps:
- Launch the Apple Music app on your Android device and start playing a song.
- Locate the Now Playing interface, which displays the currently playing track.
- In the top-right corner of the interface, you'll find a vertical three-dot menu. Tap on it.
- From the menu that appears, select the option labeled "Sleep Timer."
- Choose the desired duration for the sleep timer.
- Once you've selected the duration, the sleep timer will be activated.
- Apple Music will automatically stop playing the song after the predetermined time period elapses.
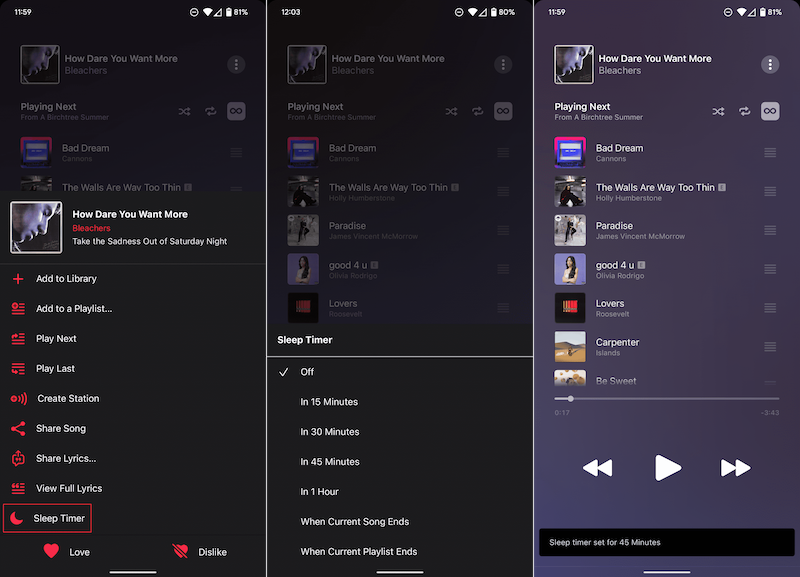
By following these steps, you can easily set a sleep timer in Apple Music on your Android phone, ensuring that the music playback stops after the specified duration.
Part 3. Set Apple Music Sleep Timer on Mac
To set a sleep timer in Apple Music on your Mac, follow these steps:
- Open System Preferences on your Mac and navigate to the "Battery" settings. If you're using macOS Catalina or an earlier version, look for "Energy Saver" instead.
- Click on the "Schedule" button. This will allow you to set a specific time for your Mac to shut down or go to sleep.
- Choose the preferred time for your Mac to enter sleep mode and click "Apply" to confirm the settings.
- Start playing songs in Apple Music on your Mac.
- At the scheduled time, your Mac will automatically go into sleep mode, and Apple Music will stop playing.

By following these steps, you can schedule your Mac to go into sleep mode at a specific time while playing Apple Music. This ensures that your Mac conserves energy and that the music playback stops according to your desired schedule.
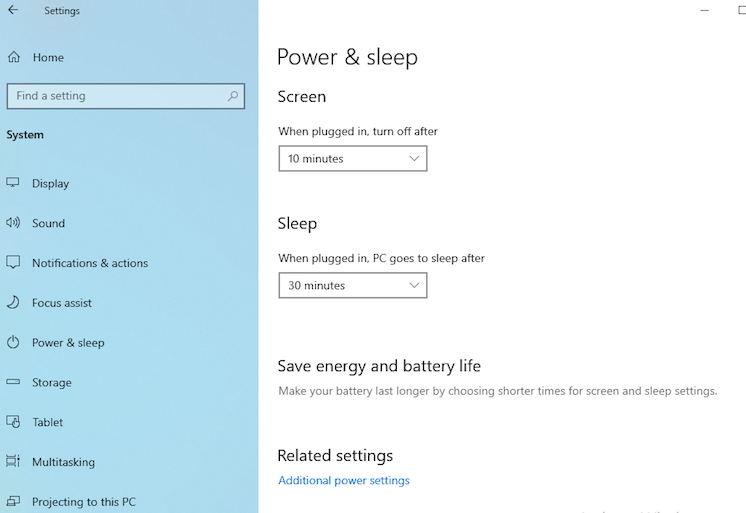
Part 4. Set Apple Music Sleep Timer on Windows
To set a sleep timer in Apple Music on your Windows, follow these steps:
- Open the Settings menu on your PC.
- Navigate to the "System" category.
- Click on "Power & Sleep" or a similar option.
- Look for the "Sleep" settings.
- Set the desired time duration for your PC to go to sleep after inactivity.
- Once the set time elapses and your PC enters sleep mode, Apple Music playback will automatically stop.
By configuring the sleep settings on your PC, you can ensure that Apple Music stops playing when your computer goes to sleep. This helps conserve power and prevent the continuous playback of music when your PC is not in use. The exact steps and terminology may vary slightly depending on your PC's operating system and version.
Part 5. Set Apple Music Sleep Timer on Homepod
To set a sleep timer for Apple Music on a HomePod, you can follow these steps:
- Start playing music on your HomePod using Apple Music.
- You can activate Siri on your HomePod by saying, "Hey Siri" or by tapping and holding the top surface of the HomePod.
- Once Siri is activated, say, "Set a sleep timer for [duration]."
- Replace [duration] with the desired time, such as "30 minutes," "1 hour," or a custom duration.
- Siri will confirm the sleep timer and start the countdown.
- The music playback on your HomePod will automatically stop when the sleep timer expires.
By using Siri voice commands, you can easily set a sleep timer for Apple Music on your HomePod. This allows you to enjoy music or audio content before bed without worrying about manually stopping playback or leaving it running all night.
Extra Tip: How to download Apple Music to MP3?
To convert DRM protected Apple Music songs to mp3, all you need is Ondesoft Apple Music Converter . Available on Mac and Windows, it allows you to quickly download any Apple Music songs to DRM-free mp3, m4a, etc. with 100% original quality and all ID3 tags.
1. Download and Launch Apple Music Converter
Download and install Ondesoft Apple Music Converter on your Mac or Windows. Once installed, launch the program.


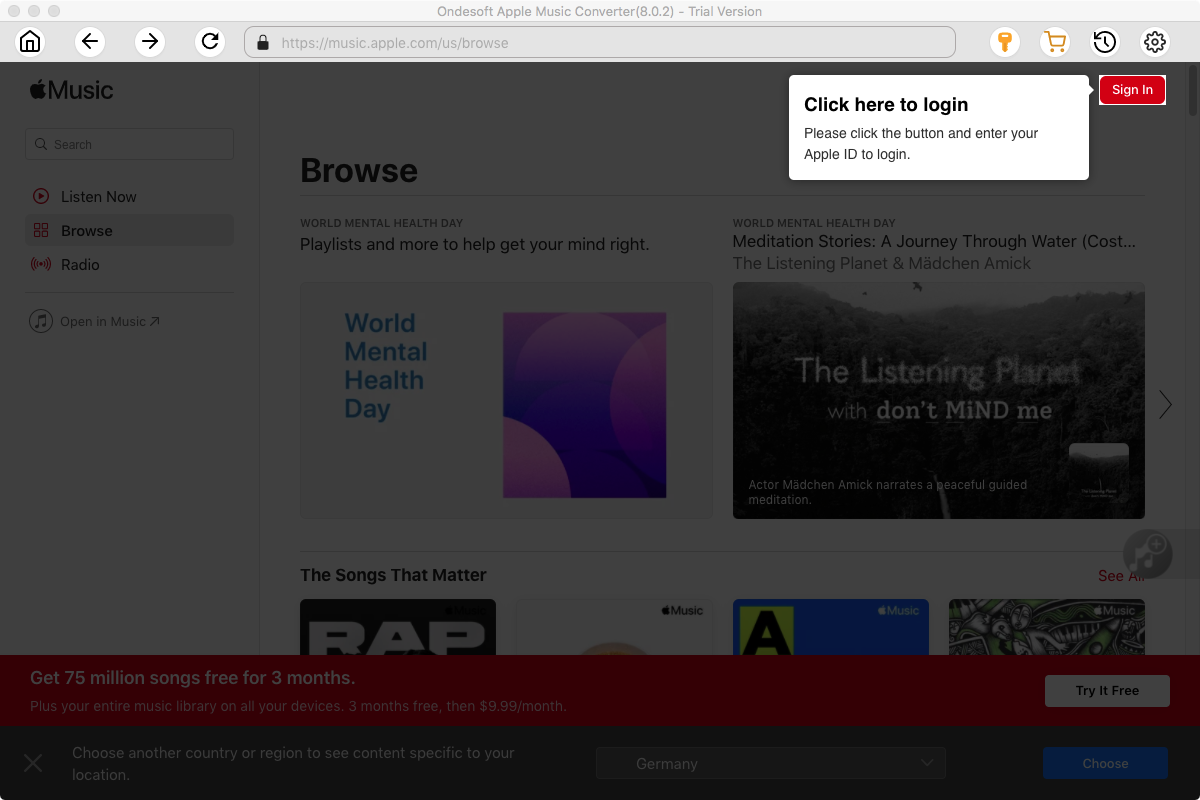
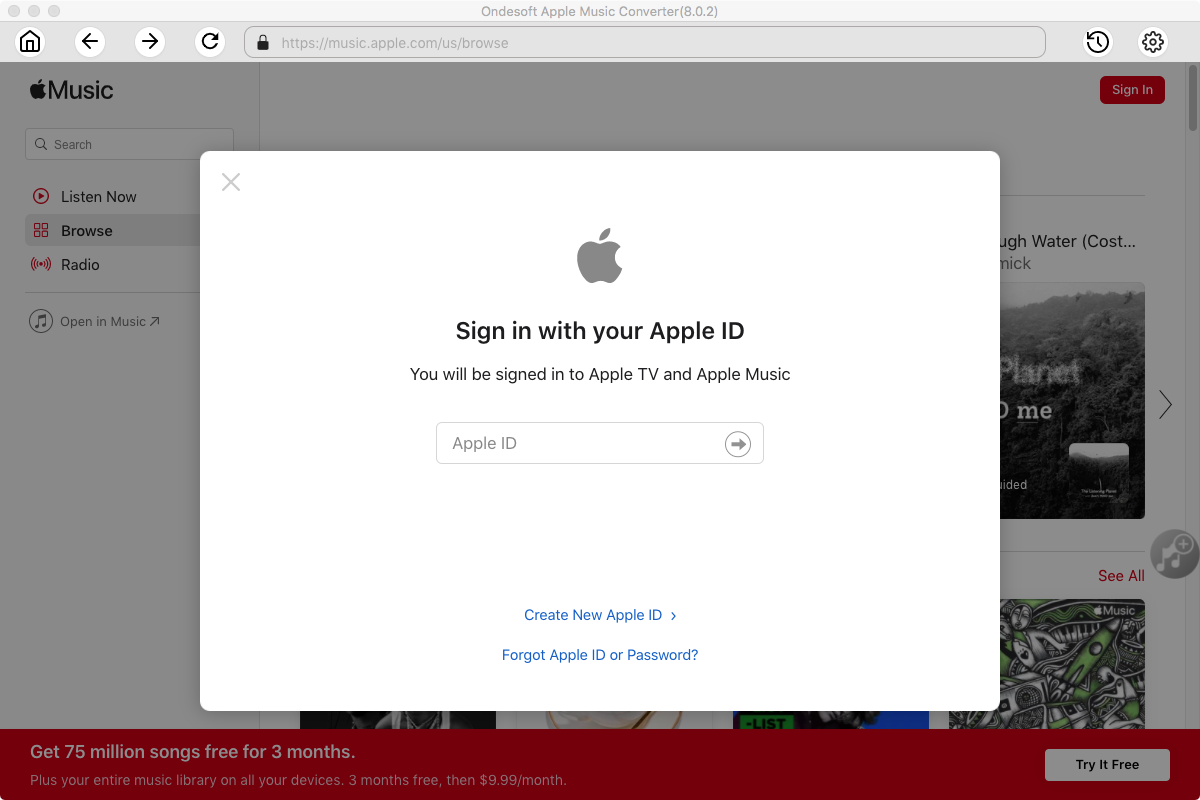
2. Sign in your Apple Music account
Click the Sign in button and enter your Apple ID.
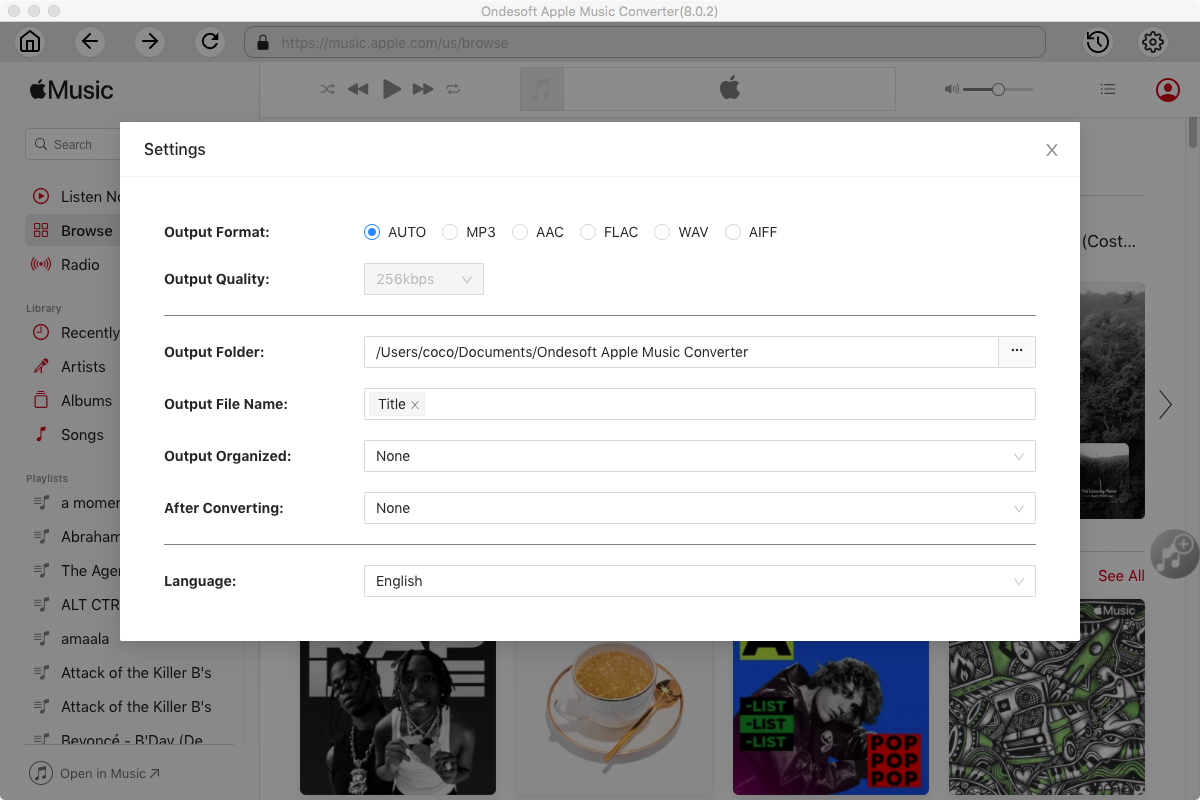
3. Change output format(optional)
The default output format is lossless M4A. Ondesoft Apple Music Converter also supports converting Apple Music to MP3, AAC, FLAC, WAV and AIFF. You can also customize output file name with any combination of title, artist, album, playlist index and track ID.
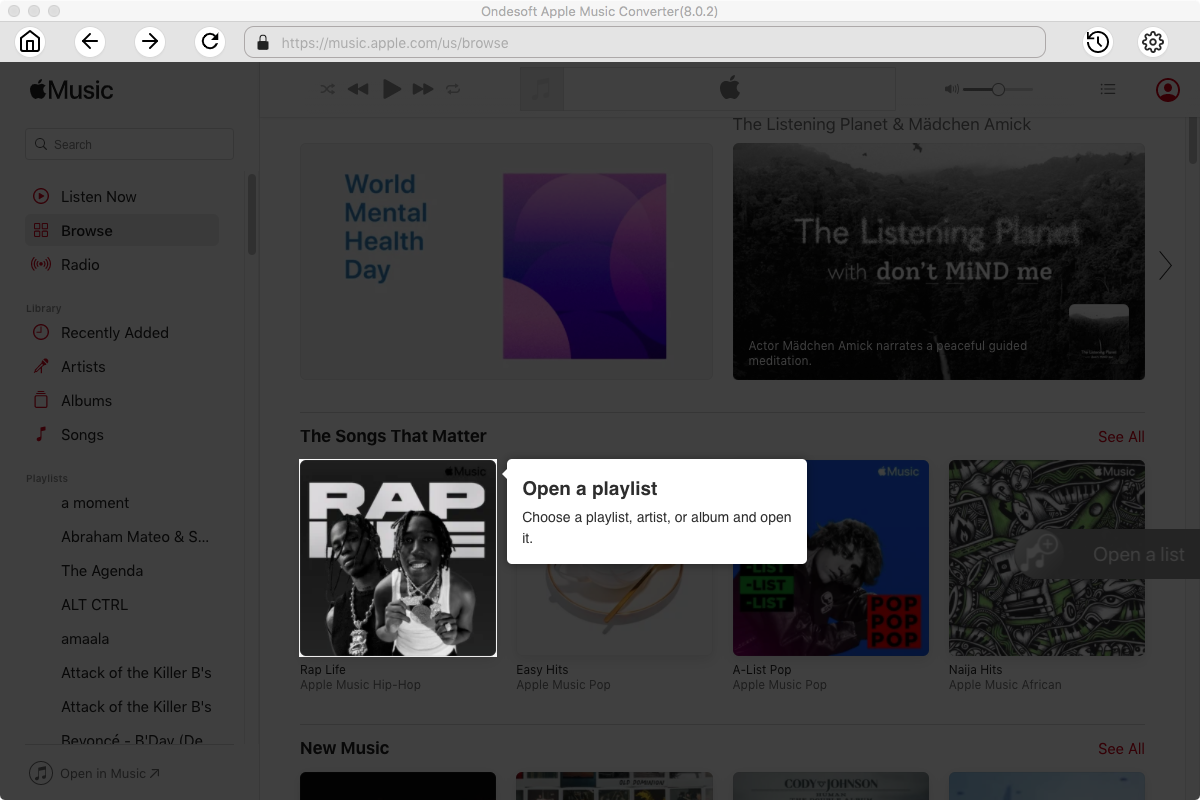
4. Select music
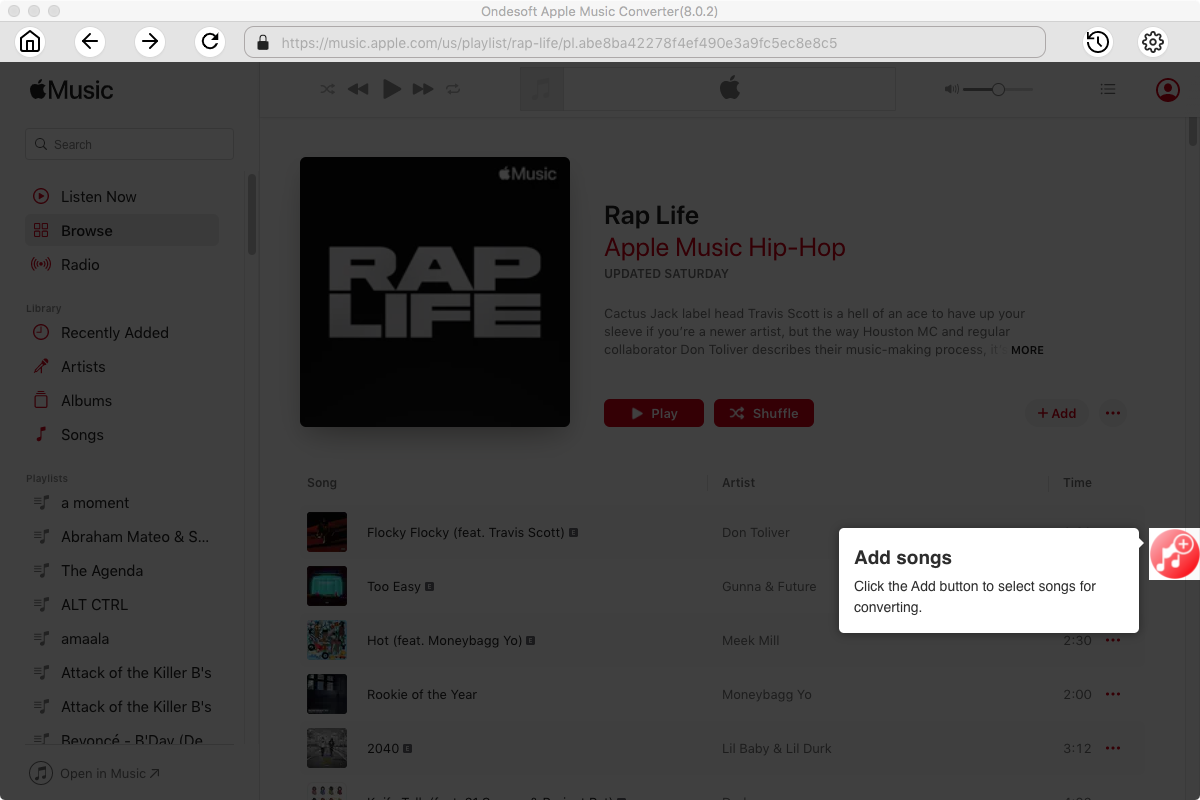
Follow the on-screen instructions to choose the playlist or album you want to convert.
Click Add songs to add them to the conversion list.
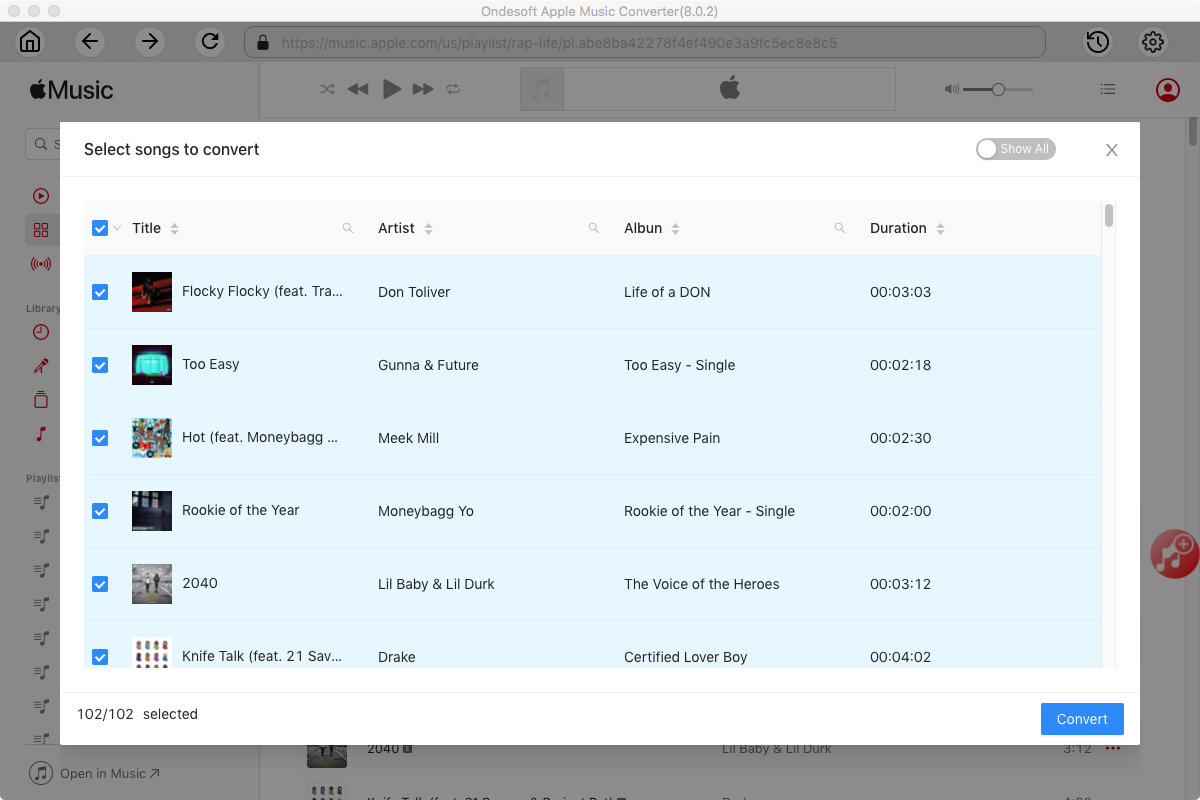
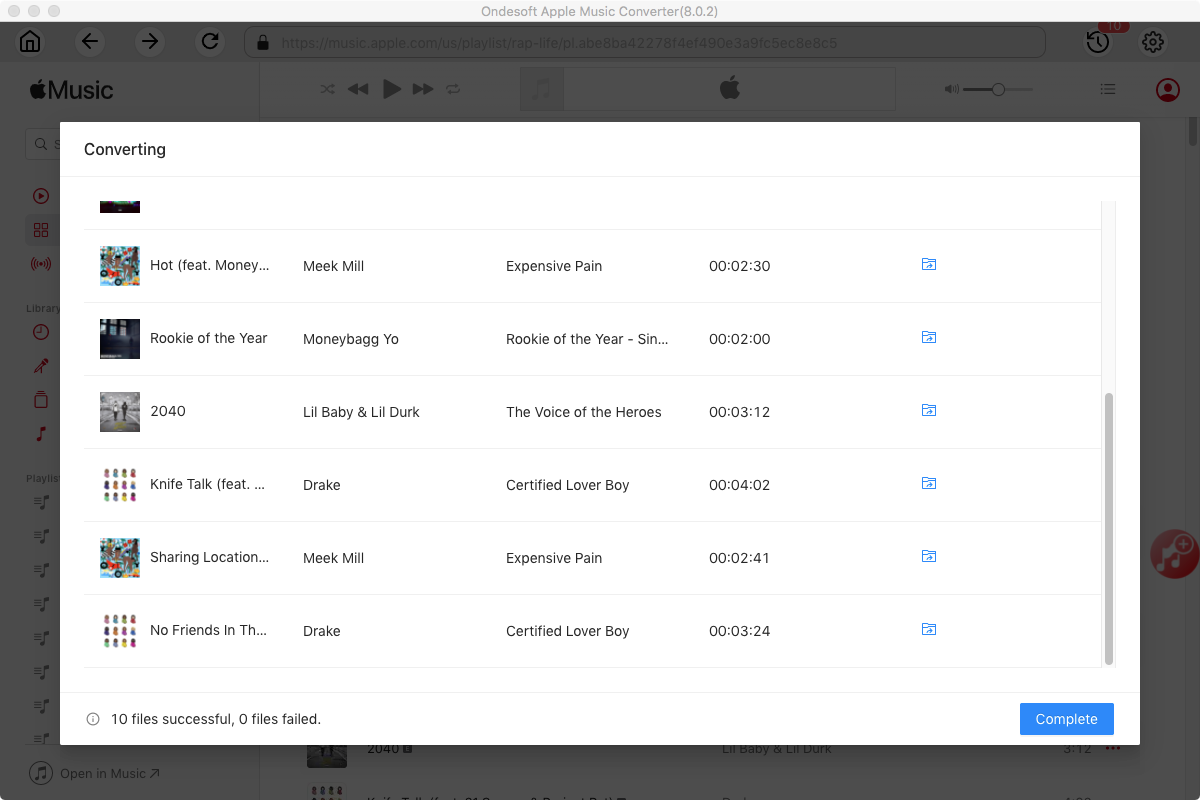
5. Start Conversion
By default, all songs in the playlist/album will be checked. If there are songs you don't want to convert, please uncheck the box. Then click Convert button to start downloading songs to the format you choose.
After conversion, click below folder icon to quickly locate the downloaded songs.
Apple Music Converter

Download Apple Music songs, albums, playlists to MP3, M4A, AAC, FLAC, WAV and AIFF.

