4 Ways to play Apple Music in Tesla
Apple Music support for Tesla cars is something that Tesla owners have long been waiting for, as the electric car company has previously only worked with streaming services like Spotify. Finally, the Tesla 2022.44.25 Software Update has brought Apple Music to the in-car entertainment system for Tesla vehicle owners in December, 2022. Now you can stream Apple Music from the Media Player in your Tesla. Gain access to an extensive collection of over 100 million songs and 30,000 playlists without any interruptions from ads. Enjoy the freedom to listen to your entire music library, explore fresh tracks, and even tune in to live radio stations for a diverse and immersive music experience.
Contents
- Play Apple Music in Tesla with Apple Music app
- Play Apple Music in Tesla via Bluetooth
- Connect your phone to Tesla
- Play Apple Music in Tesla from USB device
- FAQs about playing Apple Music in Tesla
Read More: How to set Spotify as alarm sound on Windows?
1. Play Apple Music in Tesla with Apple Music app
To access Apple Music, tap the Apple Music icon in the Application Launcher, scan the QR code with your mobile device, and login with your Apple ID. It is available across all of the Tesla Model S, 3, X and Y. so definitely be sure to install the 2022.44.25 update or later in order to get Apple Music app. Apple Music Streaming is available only when a data connection is available (for example, Wi-Fi or Premium Connectivity)
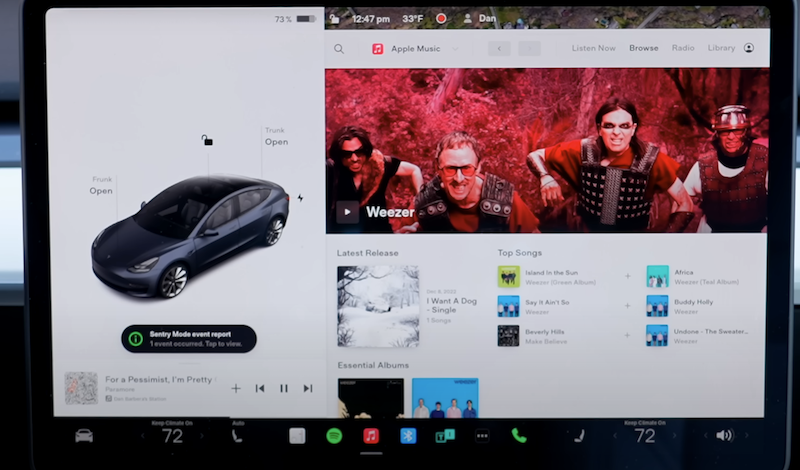
Note: A Premium Connectivity subscription is required to stream Apple Music over a cellular connection. If you own a Tesla vehicle for personal use, you will be able to subscribe to Premium Connectivity from the Tesla app. If you are driving a company vehicle, contact your vehicle provider for more information. Premium Connectivity is currently available as a monthly subscription of $9.99 plus applicable tax or as an annual subscription of $99 plus applicable tax.
If you don't have Premium Connectivity subscription, you can hotspot your phone to the car and use the built-in Apple Music app in your Tesla.
However, there are certain limitations to be aware of:
- Lossless audio and Dolby Atmos are not supported.
- Downloading songs to the car, similar to Tidal, is not possible.
- The car does not appear to buffer the next track in advance.
- 'Clean' filters applied to playlists are not remembered, so it's necessary to reapply them in the car to avoid any potential embarrassment.
- Explicit content is blocked.
- Shuffle functionality is limited to shuffling based on pages.
- No Recently Added option.
- No lyrics.
- When you use the voice command to play something in Apple Music, it only displays the title(s) on the screen but does not actually start playing the song until you select it.
2. Play Apple Music in Tesla via Bluetooth
Besides accessing Apple Music app from your vehicle’s touchscreen, you also have the option to play audio files from a Bluetooth-connected device, such as a phone, iPod Touch, iPad, Android tablet, and more.
Once a phone is paired, your Tesla vehicle can automatically connect to it when the phone is within range. To pair a phone, follow these steps while inside your Model 3:
- Ensure that both the touchscreen and the phone are powered on.
- On your phone, enable Bluetooth and make sure it is discoverable. On many phones, Bluetooth turns off if the phone’s battery is low. So make sure there is enough battery.
- Tap the Bluetooth icon located at the top of the Controls screen on the Tesla touchscreen.
- On the touchscreen, tap "Add New Device" and then select "Start Search". A list of available Bluetooth devices within range will appear on the Bluetooth settings screen.
- Choose the desired phone from the list to initiate the pairing process. Within a few seconds, a randomly generated number will be displayed on both the Bluetooth settings screen and your phone.
- Verify that the number displayed on your phone matches the one shown on the Tesla touchscreen. Once confirmed, accept the pairing request on your phone.
- If prompted on your phone, indicate whether you want to allow Model 3 to access your personal information, such as calendar, contacts, and media files.
- Once your phone is successfully paired and connected to Model 3, you can play Apple Music songs on your phone, and the audio will be output through Tesla's Media Player.
- When an Apple Music song begins playing, you can use the Media Player's next and previous icons on the touchscreen or utilize the left scroll button on the steering wheel to play other tracks.
Please note that these instructions are specifically tailored for the Model 3. The process may differ slightly for other Tesla models. Refer to your vehicle's user manual for more precise instructions if needed.
If you have your iPhone connected to the Tesla via bluetooth, but can’t get the sound from Tesla speakers whenever try to play Apple Music on your iPhone, remember to change the audio source from within the Media Player screen by choosing Bluetooth from the dropdown list.
3. Connect your phone to Tesla
You can also enhance your audio experience by connecting your iPhone to your Tesla vehicle using a USB cable and enjoy lossless audio playback.
To connect your iPhone to a Tesla vehicle and play lossless audio, follow these steps:
- Ensure that your Tesla vehicle and iPhone are powered on.
- Use a USB cable to connect your iPhone to the USB port in your Tesla vehicle. The USB port is typically located in the center console.
- On the Tesla touchscreen display, navigate to Media Player.
- Choose the USB option as the audio source.
- On your iPhone, open the Music app or any other music streaming app that supports lossless audio.
- Select and play the lossless audio content on your iPhone.
- The lossless audio from your iPhone will be transmitted through the USB connection and played through the Tesla vehicle's audio system.
4. Play Apple Music in Tesla from USB device
Using a USB drive remains an excellent method for playing offline music in Tesla vehicles. How to play Apple Music in Tesla from USB drive? Here we will use Model S
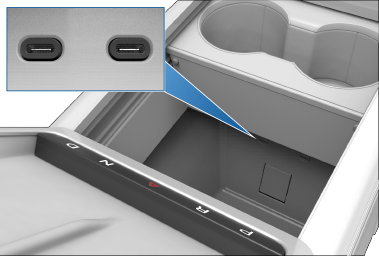
The Model S is equipped with a total of five USB ports for various purposes:
- Two USB ports are situated in the front compartment of the center console. These ports can be utilized to charge USB devices and play audio files from a phone or USB device.
- Two USB ports are positioned below the rear touchscreen and can be used for charging USB devices.
- One USB port is located inside the glovebox and is equipped with a USB flash drive. This port is securely positioned, making it an ideal location to store Sentry Mode and Dashcam video footage.
To play music on a Tesla vehicle using a USB drive, follow these steps:
- Prepare your USB drive: Ensure that your music files are in a compatible format, such as MP3 or FLAC, and stored on the USB drive.
- Insert the USB drive: Locate the USB port in your Tesla vehicle. The port is typically located in the center console or glove compartment. Insert the USB drive into the USB port.
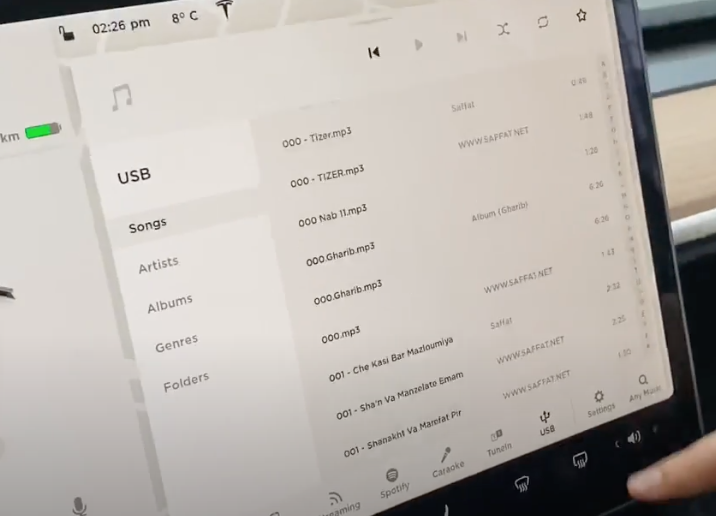
- Access the Media Player: On the Tesla touchscreen display, navigate to Media Player > USB. Tap on it to open the media player interface.
- Select USB as the audio source: Within the media player, select the USB option as the audio source. This will allow you to access and play the music stored on the USB drive.
- Browse and play music: Use the touchscreen or physical controls to browse through the music files on the USB drive. You can navigate through folders, albums, or playlists to find the desired music.
- Start playing music: Select a song, album, or playlist and tap on it to start playing the music. You can adjust the volume and control playback using the touchscreen or steering wheel controls.
Notes:
- Tesla Media Player supports USB flash drives with exFAT formatting (NTFS is not currently supported).
- Use a USB port located at the front of the center console. The USB port at the rear of the console is for charging only.
Indeed, if you are able to download Apple Music songs and convert them to the MP3 format, you can subsequently play these songs on any Tesla vehicle by transferring them to a USB drive.
How to download Apple Music to MP3 and transfer to USB drive
To convert DRM protected Apple Music songs to MP3, all you need is Ondesoft Apple Music Converter . Available on Mac and Windows, it allows you to quickly download any Apple Music songs to DRM-free MP3, M4A, etc. with 100% original quality and all ID3 tags.
1. Download and Launch Apple Music Converter
Download and install Ondesoft Apple Music Converter on your Mac or Windows. Once installed, launch the program.


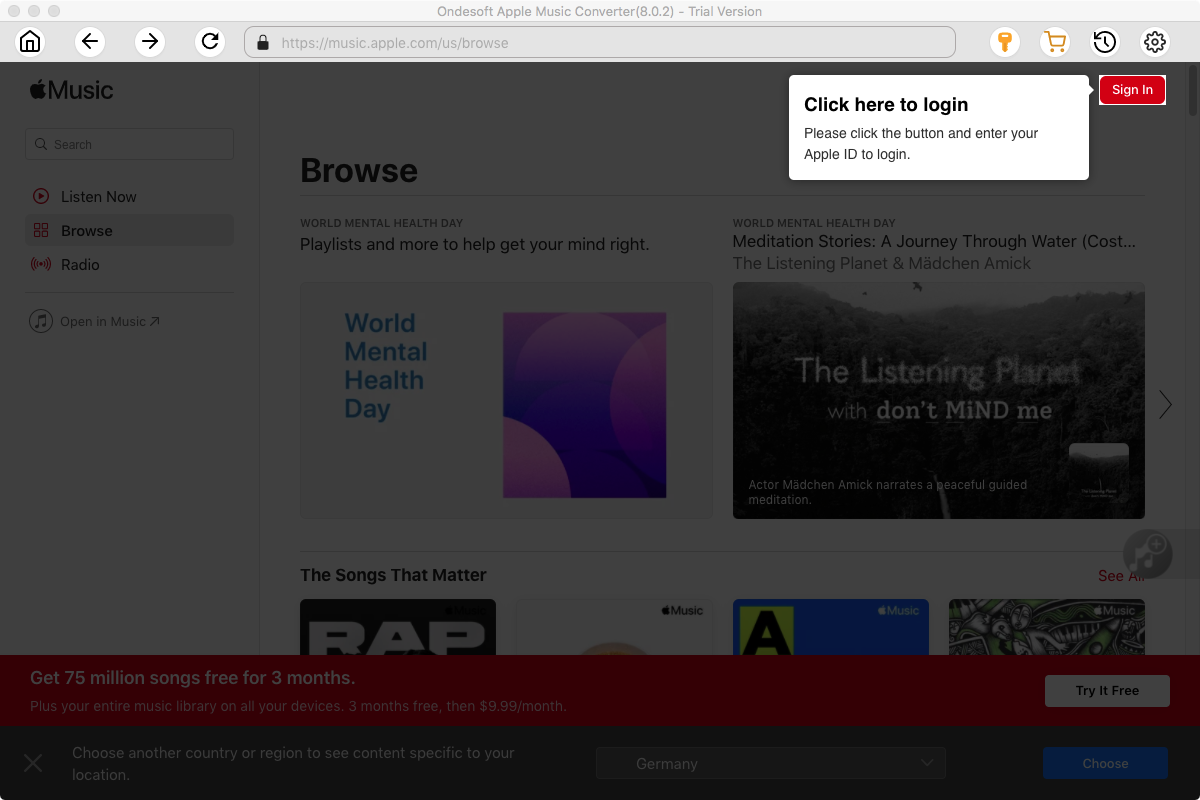
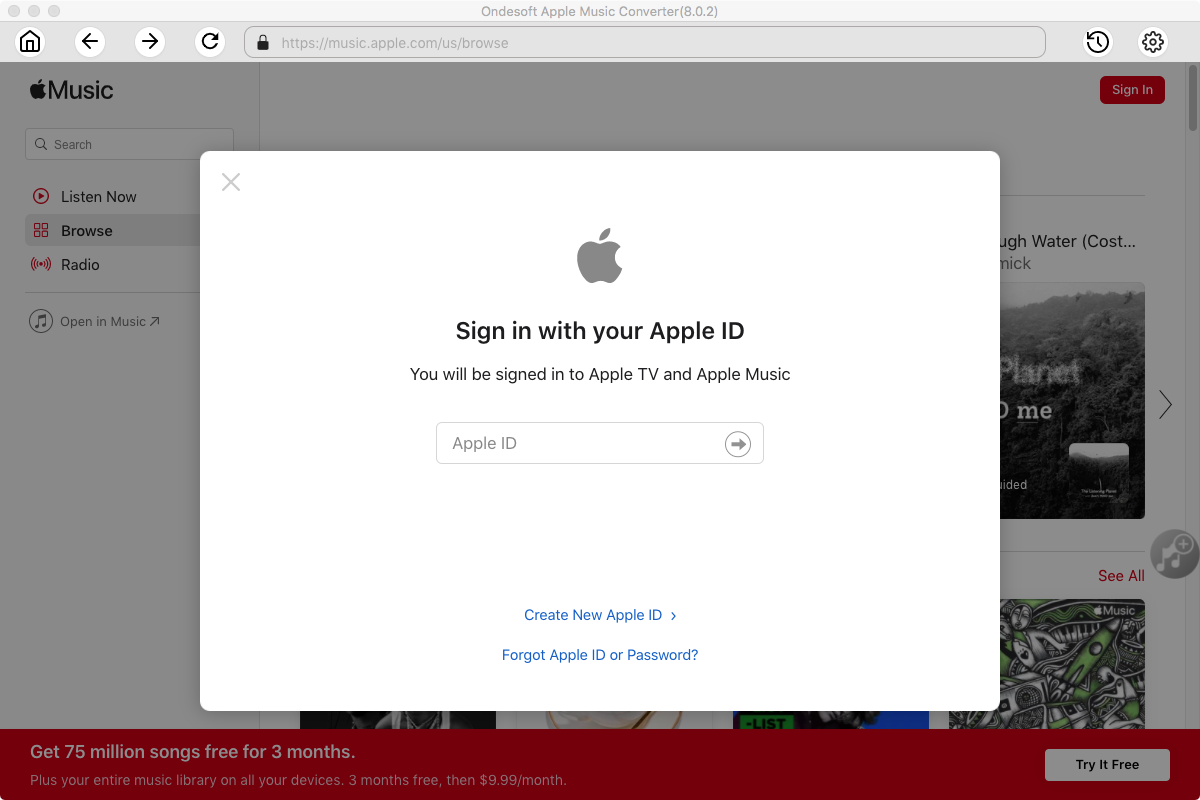
2. Sign in your Apple Music account
Click the Sign in button and enter your Apple ID.
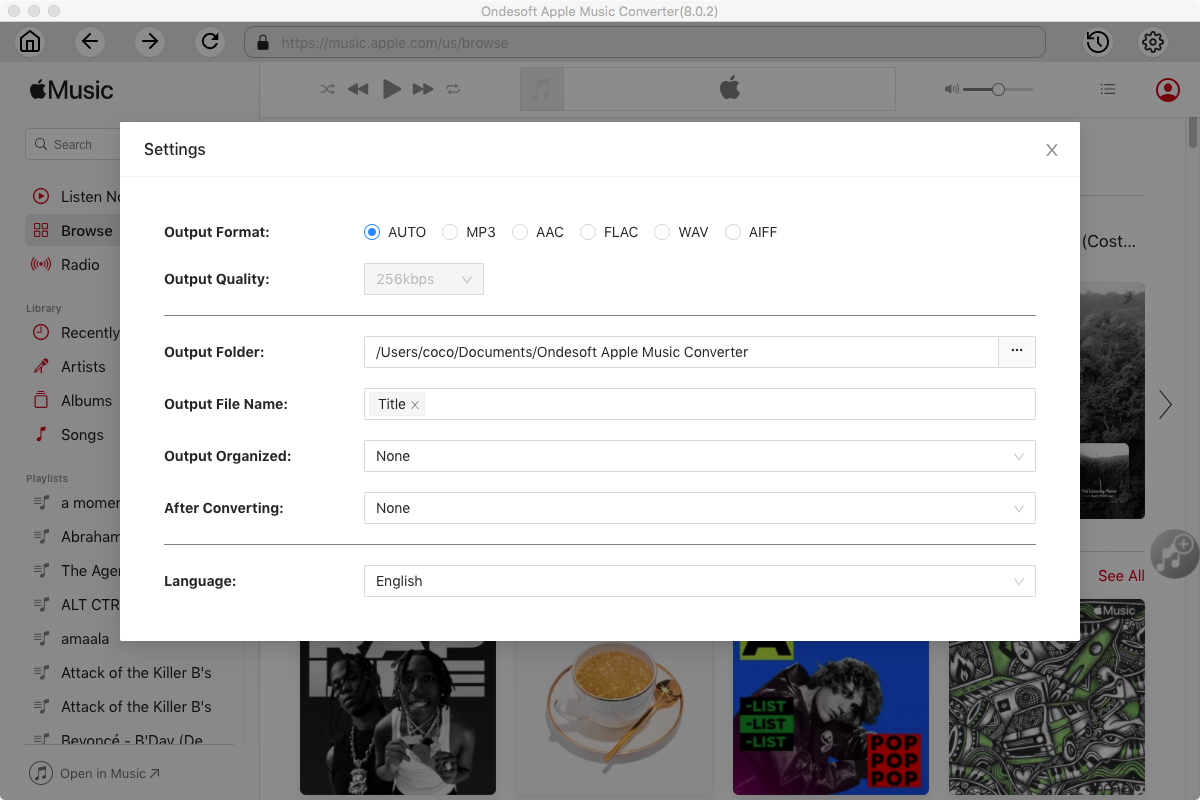
3. Change output format(optional)
Click the Settings icon to select the output format. The default output format is lossless M4A. Ondesoft Apple Music Converter also supports converting Apple Music to MP3, AAC, FLAC, WAV and AIFF. You can also customize output file name with any combination of title, artist, album, playlist index and track ID. After adjusting the settings, click X button to confirm your selections.
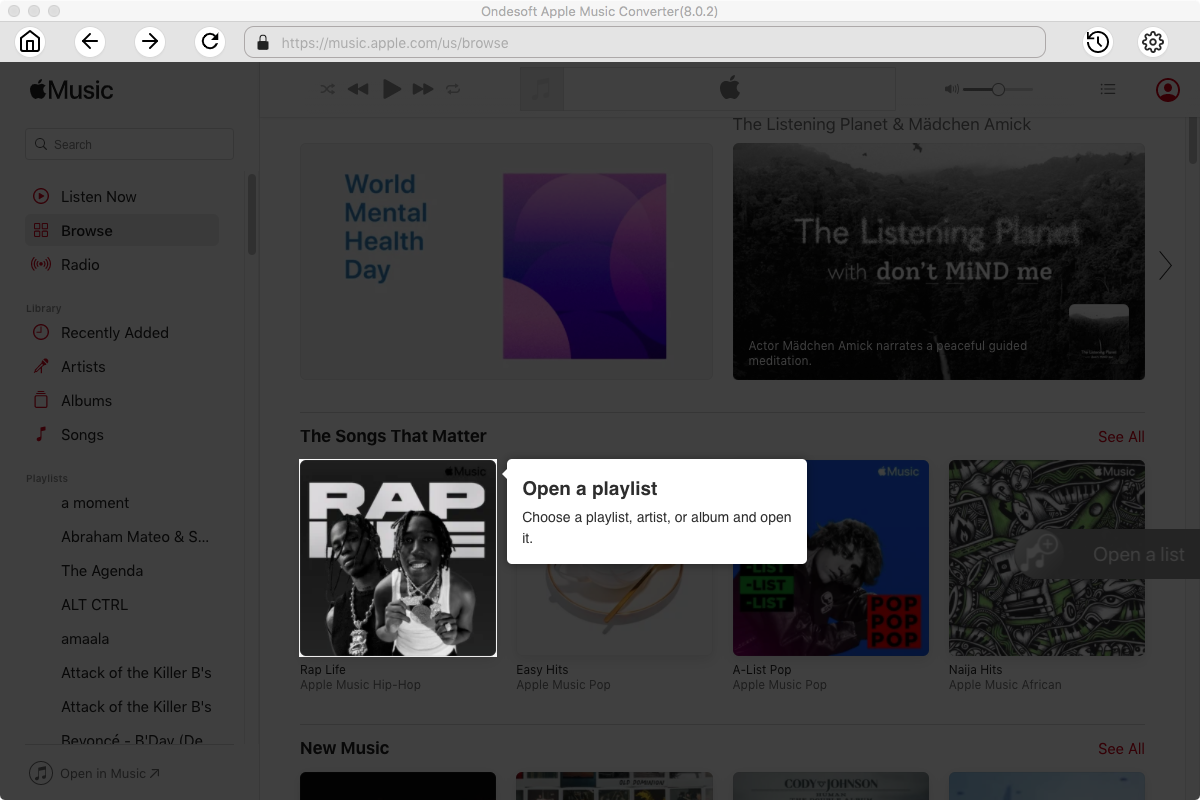
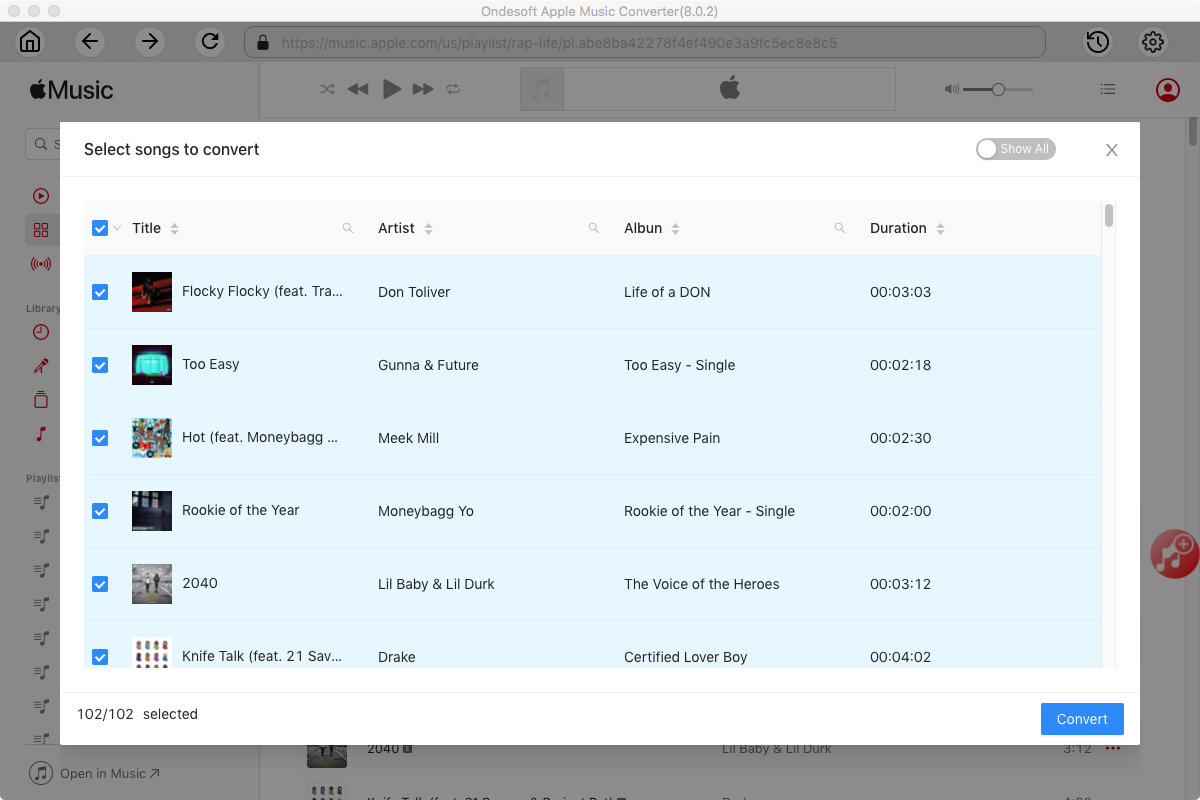
4. Select music
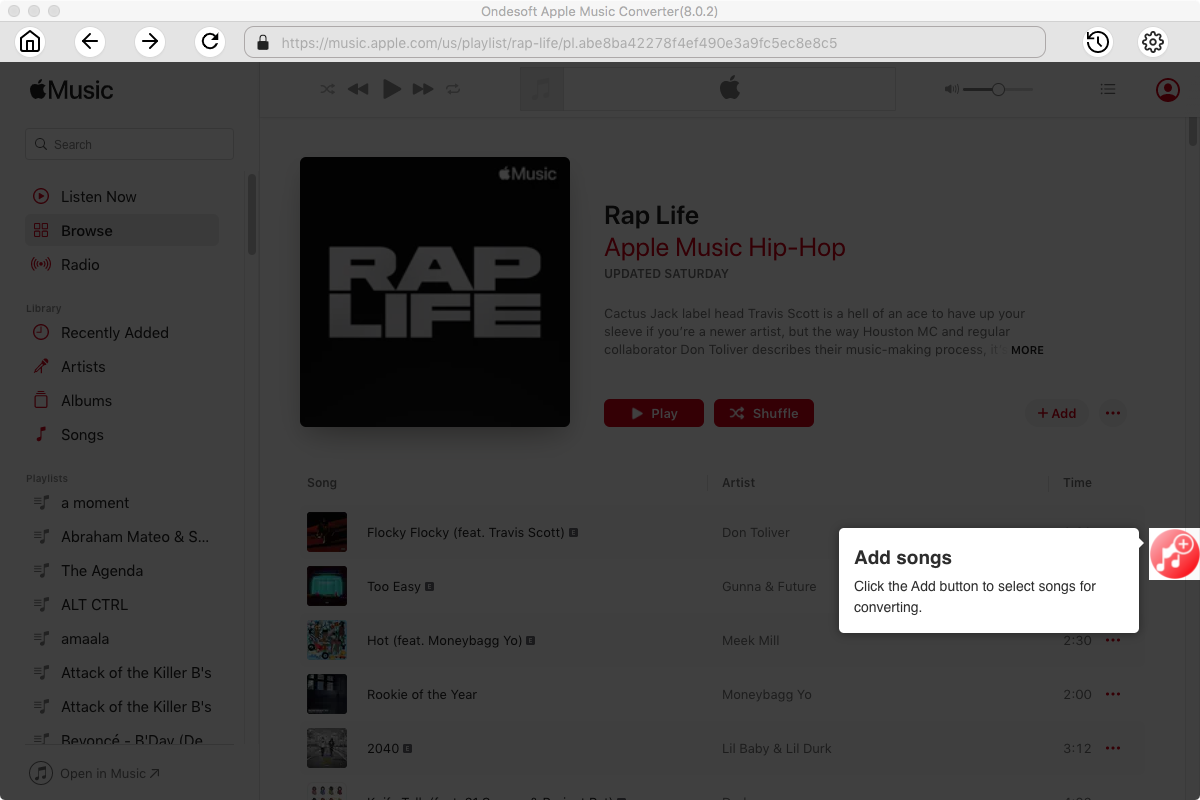
Follow the on-screen instructions to choose the playlist or album you want to convert.
Click Add songs to add them to the conversion list.
5. Start Conversion
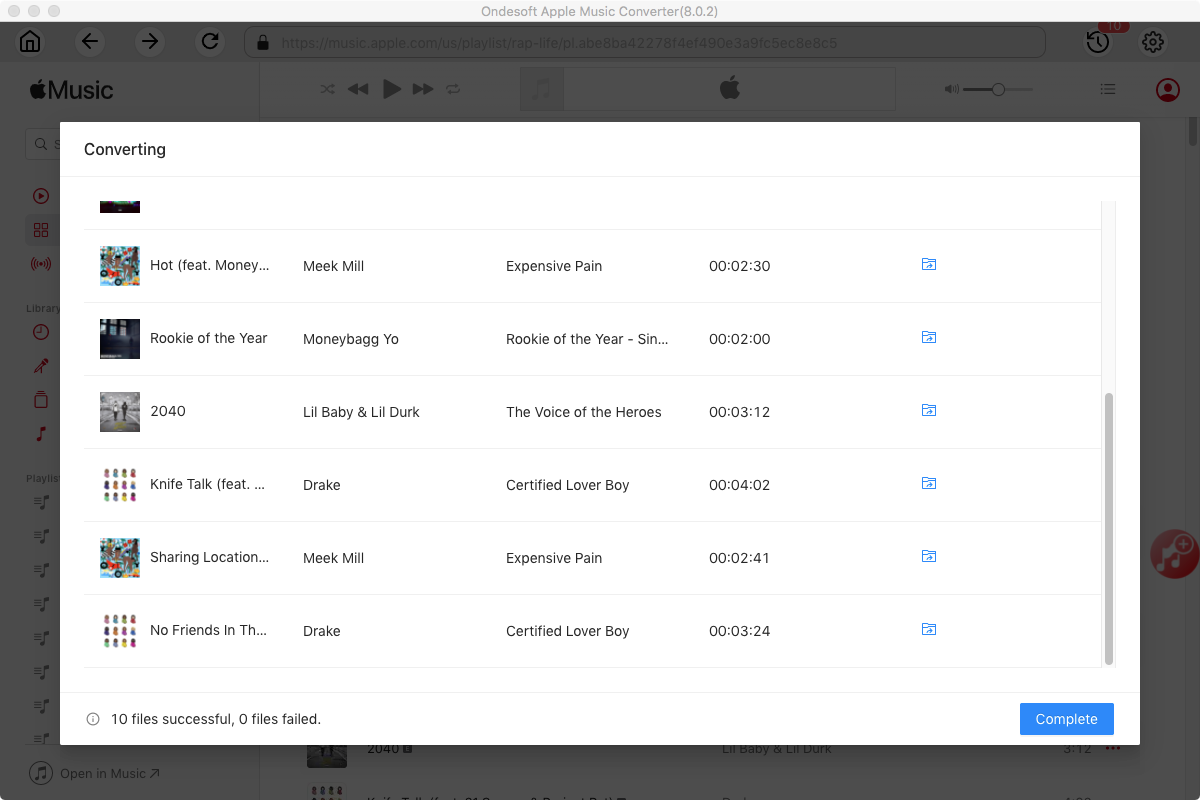
Click the Convert button to begin converting your Apple Music tracks. By default, all songs in the playlist/album will be checked. If there are songs you don't want to convert, please uncheck the box. Then click Convert button to start downloading songs to the format you choose.
Once the conversion is complete, click below folder icon to quickly locate the downloaded songs. Transfer them to your USB drive and then play them in Tesla anytime you want.
FAQs about playing Apple Music in Tesla
How many music services does Tesla support now?
Tesla now supports 9 music services in its vehicles: Spotify, Tidal, Apple Music, Amazon Music, YouTube Music, Streaming (through LiveOne, formerly Slacker Radio), Caraoke, TuneIn, and Radio.
Apple Music Converter

Download Apple Music songs, albums, playlists to MP3, M4A, AAC, FLAC, WAV and AIFF.

